Transplanting potted plants from on pot to another can be a bit stressful, especially if no one’s ever taught us how.
The process is actually pretty easy and this article intends to teach you everything you need to know about the signs to look for when your plant requires upsizing, and the best practices for transplanting from one pot to another.
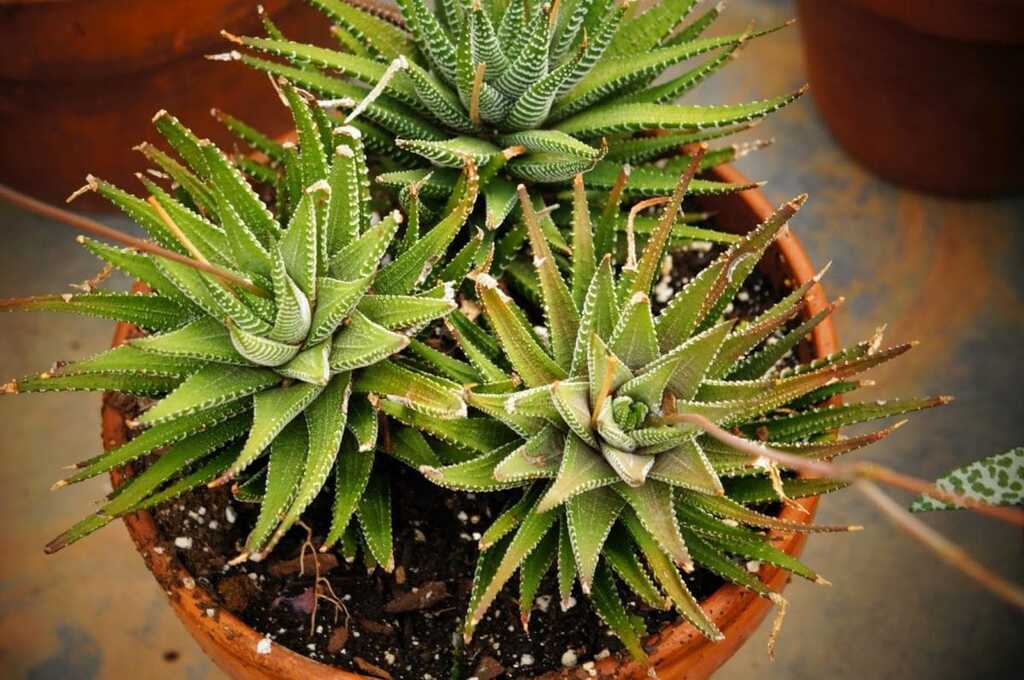
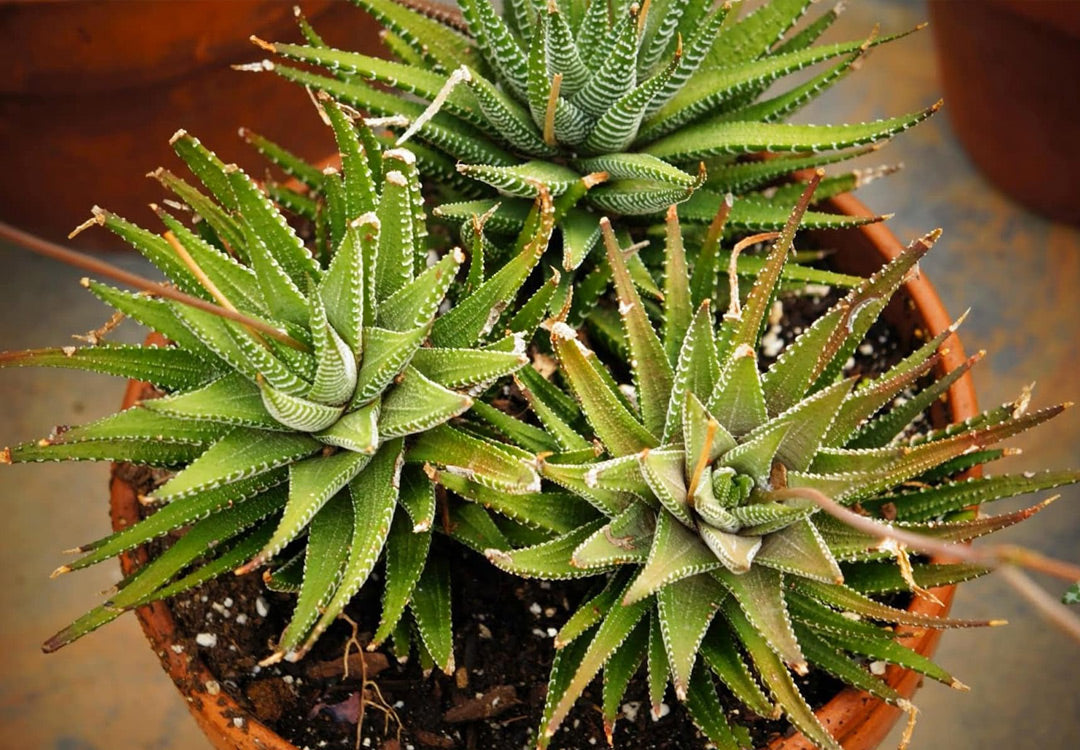
Succulents are great in pots, as long as they get plenty of sunlight. Image source
Does Repotting & Transplanting Kill Plants?
Not necessarily. Of course it’s possible to kill our plants while repotting, but by the time you’ve read this article you’ll have the information you need to repot your plants with a much higher success rate.
We’ve all seen freshly planted seedlings die off within a couple of weeks, often at shopping centres and council median strips where many have been planted quickly. Usually the budget of this sort of work accounts for a certain percentage of plant deaths.
Some of the most common ways we damage or kill our plants by repotting are:
-
Using the wrong potting mixture: all plants have their own needs; some prefer to keep wet feet and others prefer to keep their feet dry. They’ve evolved on different parts of the earth so of course they all have their own soil preferences that we need to keep in mind.
-
Not watering adequately: transplanting is a shock for plants, and they need adequate water to make the transition. We need to make sure we water well when we transplant.
-
Over-fertilising: it’s usually best to avoid using most fertilisers because the roots are fragile and often damaged during transplant, and more susceptible to nutrient burn. We should, however, definitely use a liquid seaweed fertiliser which has a broad spectrum of nutrients without the danger of nutrient burn. You can read more about seaweed fertiliser here.
-
Repotting when not necessary: If the plant hasn’t yet filled out the existing pot, re-potting into an even larger pot may cause water to sit in the pot unused, encouraging fungal attack (read more about fungal pathogens here).
With that being said, any time you disturb a plant’s roots it will be shocked, and sometimes a plant will just die during transplant even if we’re doing everything right. Sorry to be the bringer of bad news, but there are no promises when it comes to gardening.
How Long Can You Keep A Plant In A Container?
It’s better to repot when the plant’s ready for the safety of the plant in question. Some say that plants like to be repotted every year or two, but it’s usually best to let the plant tell you when it’s time by following the 6 signs below.
When To Repot: 6 Signs Its Time
Here are the 6 signs I use to know it’s time to repot:
1. Firstly, I check if the plant’s root-bound. You can see the roots are a tangled mess when you pull the root ball out of the pot. Roots may even be coming out the bottom of the pot, breaking the pot, or pushing the root ball out of the pot.
2. The plant is top-heavy and the pot isn’t able to support the plant as well as it used to due to the fact the plant’s put on a lot of branch and leaf growth, and the roots can’t grow to accommodate.
3. Water runs out the bottom of the pot more quickly than it used to because there isn’t enough potting mixture to hold the moisture.
4. You notice the plant looks thirsty more quickly after each watering that you give it.
5. The plant has been growing more slowly this growing season. There may even be a bit of dieback in extreme cases.
6. There’s a noticeable mineral build-up that looks like salt, which can end up becoming a problem for the plant’s health.
Different plants have different needs when it comes to repotting; some don’t mind being a bit root bound, and others need space to grow into. Make sure you have a good understanding of your plant before taking any action.
Best Time Of Year To Repot
Generally, the best time to repot is early in spring, just at the start of the growing season, so that the roots can grow into the new potting mix. With that being said, I’ve repotted plants at all different times of the year.
Best Time Of Day To Repot
If you have a regular watering cycle, repotting just before the plant is expecting a watering can be a good idea.
Generally, the best time to repot is early in the morning or in the afternoon, not during the hot part of the day. If you’ve decided to try and do this during the middle of summer or a heatwave, consider doing it in the afternoon to give it as much time as possible to adjust.
Choosing A Pot
There are a wide range of pot styles available out there.
Ornamental pots that have drainage can be planted directly into, however you do need to think about where the water will drain into. Usually you’d put a saucer to catch the water.
Terracotta and ceramic pots suck moisture out of the soil much more quickly than plastic pots, so they’re a good option for plants that are susceptible to over-watering. You just need to water them more often, and soak them overnight before transplanting into them.
You can also use a self-watering pot, which has a water reservoir planted beneath the soil. If you’re using one of these, consider using a rope or piece of fabric as a wick between the very bottom of the reservoir and the potting mix.
A self-watering pot with a spout to water from the bottom in order to fill the reservoir. Especially important to avoid over-watering due to the lack of drainage. Photo via Plants Grow Here.
Avoid planting directly into pots without drainage, because almost all plants require drainage to stay healthy.
Aesthetically, the pot shouldn’t detract from the plant. Choose something funky that matches your house, while making sure it compliments the plant’s size, colour, texture and shape as well.
How To Keep Plants In The Nursery’s Pot And Display Them
When you bring a plant home from the nursery, it may or may not require repotting yet. A lot of the time you can tell it’s only fairly recently been repotted and there is a lot of loose soil around a root ball with only a few adventurous roots making their way into the new soil.
Whether or not the plant requires repotting, I like to use the double-pot (or cache pot) method where you have your plant in a plastic pot with drainage holes that sits inside a larger ornamental pot that doesn’t have any drainage holes.
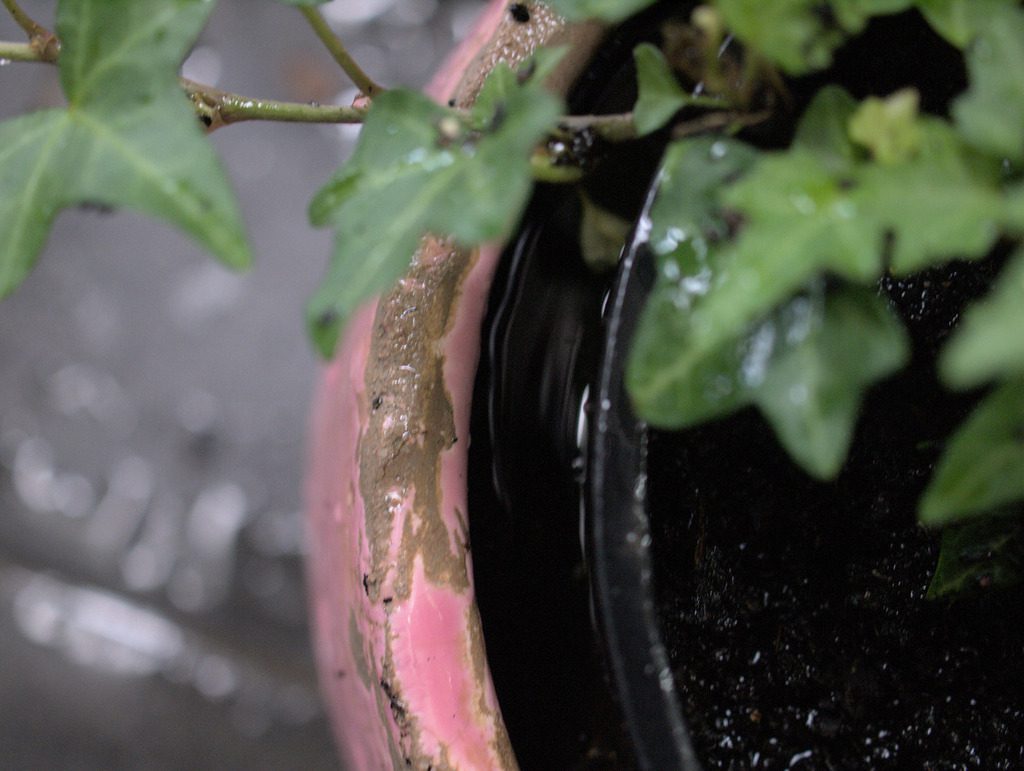
This ivy plant is in a pot inside a pot. It’s also currently being watered “from the bottom”; after the bubbles stop rising from the soil, the water is tipped out and allowed to drain. Photo via Plants Grow Here.
The excess water draines out of the plastic pot and is retained inside the ornamental pot, beneath the plant. This adds a bit of humidity around the plant, but can be a home for mosquito larvae if they’re a problem in your area.
Some people like to plant the plastic pot directly into another pot, or straight into the soil, so that the plastic pot is surrounded by soil. Fine, the plant might survive on and the roots could eventually break through the plastic, but why put your plant through all that added stress?
The best practice would be to re-pot them properly.
How Much Bigger Should The New Pot Be?
You want the pot to be one or two sizes larger than the previous size, or about 2-4 inches larger in diameter.
If your pot is too large, there is a risk that the water will sit in the pot for too long and cause fungal issues which thrive in moist conditions.
It can also be hard for the roots to get a hold in a pot that’s too large because it won’t be as firmly packed as if the root ball were snugly planted into a pot 1-2 sizes larger.
Plants that are in pots that are too small or too large can make them look a bit silly and out of proportion.
Can You Put Multiple Plants In One Pot?
Absolutely! This can work great to create a lot of interest if you have a good eye for colours, shapes and textures that work together. Put different plant combinations together at the nursery to see what works well with what before purchasing.
When you plant, do so as normal but just leave a bit of space between each plant’s root ball to be filled with potting mix.
Can You Put Plant Pots On The Lawn?
Sure, why not.
There are plenty of reasons to avoid doing this long term, not the least being that it could end up looking scrappy, however don’t let those stop you if you really want to do it.
The grass directly beneath the pot will eventually die due to the lack of sunlight, and the potted plant’s roots might end up binding it to the earth. You’ll also need to choose a pot that won’t perish in the sun or be easily damaged by the whipper snipper.
If you live in an area with mosquitos, any water in the saucer is a great breeding ground for them. However, this water would also be a source for beneficial insects such as bees.
There’s no real plant health reason other than these to keep pots off the grass, but our plants might be happier planted in the earth where they can better commune with the other plant roots and microbes, as long as the garden soil is suitable.
Best Potting Mix For Pot Plants
There are a number of options available when you’re making up a potting mixture. Plant roots are fickle and putting them in a pot can be harder on them than growing in their natural habitat, where their roots can actually stretch out.
It’s not technically correct to call potting mix “soil”, because not all mixtures actually contain any soil particles. You can read more about soil particles here.
Firstly, there are pre-mixes that you can buy ready to go in the bag. The cheaper options are often of low quality, but there are some good options out there. Look for the red Australian Standards ticks, which signify a premium product, rather than the black ticks which are of a lower standard.
Use the lower standard black tick product if you intend to add other ingredients, like compost, as the red tick products contain higher amounts of nutrients and are also better at draining.
Alternatively, you can make up your own potting mix from scratch using multiple easy-to-find ingredients based on your plant’s needs. A good potting mix balances good drainage with water retention, which sounds like a paradox, but can be achieved with the right ingredients.
Larger particles help the mixture drain; too much and the plant roots may have trouble getting a grip or finding water. Too little and water may find it hard to pass through, potentially causing root rot or drowning. Some draining ingredients are:
-
Perlite: used to lighten up a mix and assist with drainage, perlite is a natural volcanic rock with a particle size larger than sand. It holds no nutritional value.
-
Vermiculate: like perlite, vermiculate is a volcanic rock with particle sizes larger than sand and no nutritional value. However, vermiculate acts as a sponge to water and has the ability to hold onto fertiliser for longer than perlite. This is great for thirsty plants, but perlite is better for arid, dry-loving plants.
-
Sand: I wouldn’t recommend adding sand to clay soil, or having clay soil in a pot at all, but sand can be appropriate when mixed with other ingredients in a mix
-
Certain organic materials do a good job of holding moisture without drowning the plant, like a sponge. You can read more about the benefits of organic material here.
Some good organic options are:
-
Wood chips: these don’t add much in the way of nutrients, but they do hold a little bit of moisture while allowing good drainage.
-
Compost: good, old fashioned black gold adds nutrients and conditions the soil. It contains beneficial microbes that assist with nutrient uptake and overall plant health.
-
Biochar: a powerhouse broad spectrum fertiliser and soil amendment, biochar is created by slowly burning organic matter with low oxygen. It can hold carbon in this form for potentially thousands of years (long after you and your plant are dead) and it’s able to hold 270% of its weight in water.
-
Peat moss: a type of moss called sphagnum moss that has grown and died in peat pog environments. It is known as one of the best soil conditioners, resists compaction, locks in nutrients to prevent leeching, and holds up to 20 times its weight in water, though it holds little to no nutritional value for the plant. Peat moss is usually thought of as a non-renewable resource and its removal from its natural habitat is bad for the environment in a number of ways.
There really is no recipe that works for all plants, but your mixture might include bark chips, peat moss (or coco coir), perlite (to assist with drainage, or vermiculate for more moisture retention) and a fair bit of compost.
Coconut Coir: A Peat Moss Replacement?
Coconut coir is a peat moss alternative for peat. It’s a byproduct made from the fibrous husk of the coconut, and just like peat moss it makes the soil lighter, holds moisture and improves soil structure.
It’s less acidic than peat moss, which is great news for those looking to use it with plants that don’t necessarily love a heavily acidic pH level.
Something to keep in mind, though, is that peat moss sheds excess water and holds onto enough moisture without drowning plants. Coconut coir, on the other hand, holds onto a lot of this excess water which can potentially be a problem for your plant.
For this reason, consider using less coir than you would peat moss.
Controlling Plant Growth
Usually each time you repot, you’d just go up a size, and the plant will continue to grow larger above the soil and below it.
If you want to keep your plant at the same size, you can start by selectively pruning the branches to reduct the stress on the plant due to the horrific act you’re about to perform on it.
Now, remove the root ball from the pot. Take a serious knife that’s up for the task, and shave off only the very outer roots that are twisting around the inside of the pot, right around the root ball, around the outside and bottom.
Now you can treat this root ball like it is a size smaller and re-plant into the same size pot as it was in before. If successful, this will help keep a plant at a smaller size however it is a shock on the plant and not all species are up for the trauma.
How To Repot In 8 Steps
Now that we’ve decided that you need to repot, and you’ve chosen the right soils here are the 8 steps I use to transfer a potted plant to a new pot:
1. Place a few inches of soil in the bottom of the new pot; you want to make this the amount that would be the difference in height between the two pots. Ideally the original pot will have the correct potting mix in, and you’ll just match the soil for the bigger pot
2. Take the old pot off the root ball, taking care to disturb the soil as little as possible. A knife comes in handy to scrape the soil off the inside of the pot if it doesn’t come loose easily. If the roots are bound, sometimes I tease them a bit to stretch them out, and may even prune circling (girdling) roots around the outside of the pot that will constrict each other as they grow.
3. Place the root ball on the layer of soil you placed in the new pot, taking care to place it exactly in the centre, with the same amount of space the whole way around the root ball. You also want about an inch between the top of the soil and the lip of the new pot.
4. Fill in the sides with potting mix, but don’t bury the trunk any deeper than it already is. In fact, check that the root flare is exposed if relevant to the plant type, because a buried trunk can lead to disease in many plant types.
5. Firmly press the soil around the outsides without overly compacting. You want to get rid of large air pockets, but the soil should still be fluffy.
6. Water your plants from the bottom, as described in this article. The water may cause the soil to sink around the sides, in which case you may need to add additional soil to fill it in and give it another water.
7. Fertilise with some liquid seaweed fertiliser for an all-round health treatment that will help your plant get through the transplant shock.
8. Keep your plant in a well light room out of direct sunlight for a few days and keep the soil moist without being overly wet before moving it to its home.
Conclusion
There you have it! Now you have the information to transplant your plants to a larger pot when they need it. Use this power wisely.
Where To From Here?
Well, you might start with my article on watering indoor plants for a more specific look into looking after the plants we’ve just learnt to repot.
Have you ever wondered about the sorts of relationships that plants form? I’ve written down a few thoughts that I have on the subject here. Everything is connected, did ya know?
I’ve written an article on 17 questions that I recommend asking when you spot a plant health problem to help narrow down what the issue could be.
Here’s my article on fungal issues, which are common on all plants including our indoor plants. In it you’ll learn a few tactics to prevent and treat dreaded fungal pathogens.