Let’s face it: mowing lawns can be a chore. Especially if you don’t have a basic skill set that professional operators pick up along the way.
It’s the sort of task that can drag out all weekend, but just know that an average Aussie suburban lawn takes 20 minutes for two pros to whippersnip, mow, blow and go.
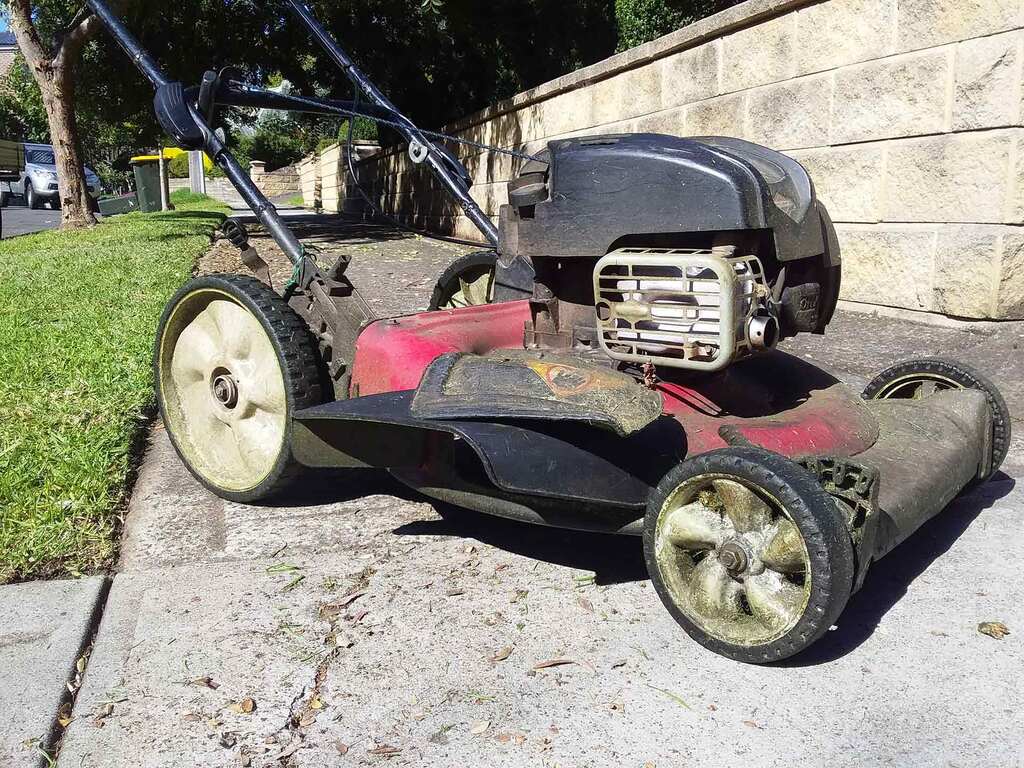
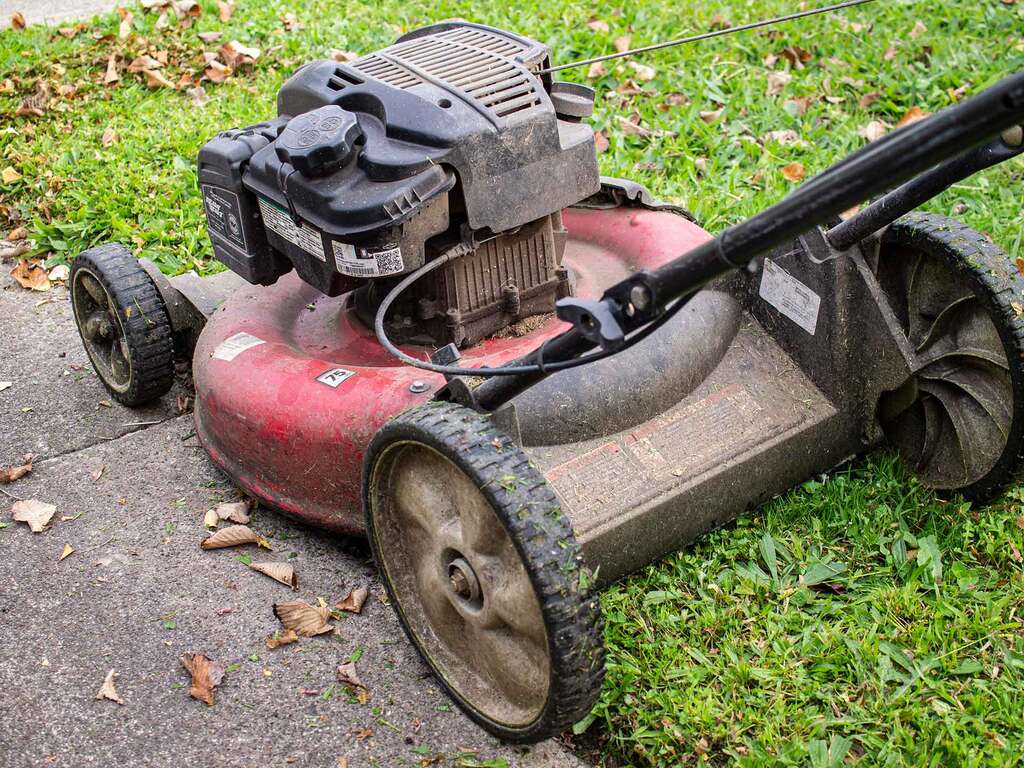
My favourite mower ever with a Briggs & Stratton engine, a Rover dedicated mulching deck and an optional side throwing attachment. It’s a light mower and the plastic is surprisingly durable – this machine is at least 2 years old and has done a lot of kilometres. The larger rear wheels help with stairs. Image via Plants Grow Here.
Whether you just want to get faster at mowing your own lawn or you’re starting a garden maintenance business, this article explains my favourite tips and tricks that I’ve learnt over 9 years as a professional gardener and trainer of lawn maintenance staff to have you halving the time it takes to mow a lawn.
Whippersnipping
Have you ever seen someone use a whippersnipper (also called a brushcutter, strimmer or weed whacker) who hasn’t been trained in its use?
They keep changing the angle they’re cutting at, they burn their cord down to a couple of centimetres, and their finished lawn has chunks cut out of it as well as long “dags” they’ve missed. The lawn looks like it’s had a bad haircut.
It can be pretty painful to observe, and it really sucks if you’re the poor soul fighting that battle.
It’s A Cutting Disc
The brushcutter is a lawn maintenance operator’s best friend or his/her worst enemy. This tool spins hard plastic cord at very fast revolutions to essentially create a cutting disc for you to use in a variety of ways, including reaching parts of the lawn that the mower can’t get.
You can purchase a steel blade for the brushcutter if you’re cutting cane in a field, but the advantage of using a cord to cut instead of a steel blade is that a cord is much easier on downpipes, trees and other fragile obstacles when you use low power.
If you’ve never used this tool before, the first thing you need to do is take it out into the field and experiment with it.
Get to know the amount of pressure you need to put on the trigger in order to get the power required to keep the cord fully extended. Using the minimum power necessary is a good habit to get into around most sites because it’s very easy to accidentally smash a window or injure a pedestrian with this tool.
Don’t get hypnotised by the spinning head when you’re using the tool; insead try to look for where the cord is cutting. Even if you can’t see the cord itself, you can see the invisible circle created by the cord and the grass that’s being chopped up.
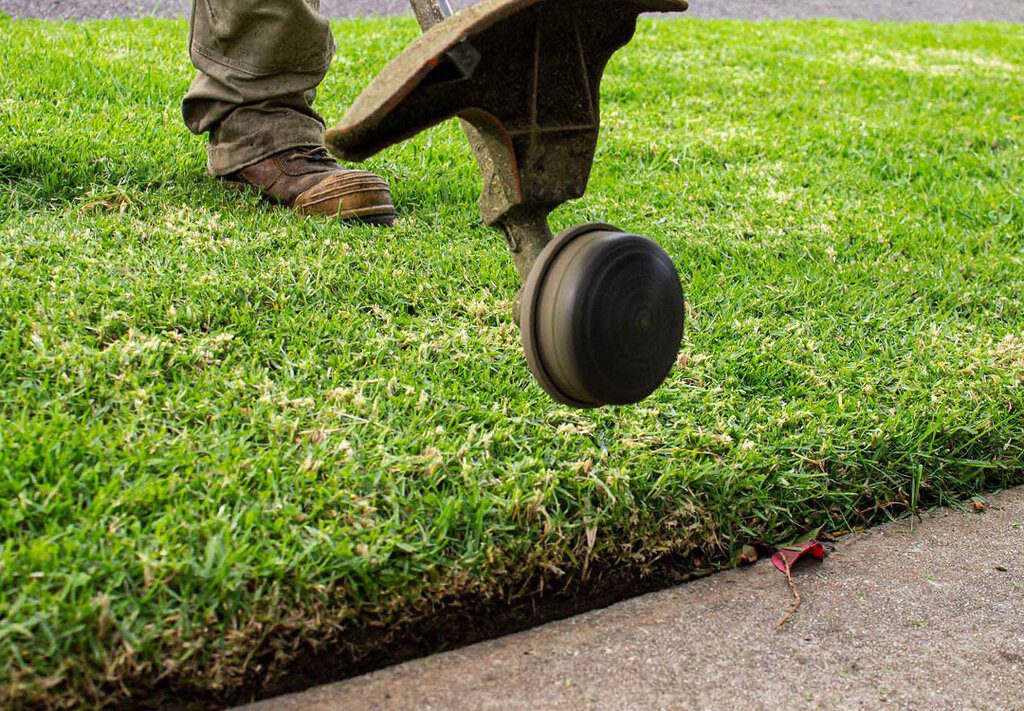
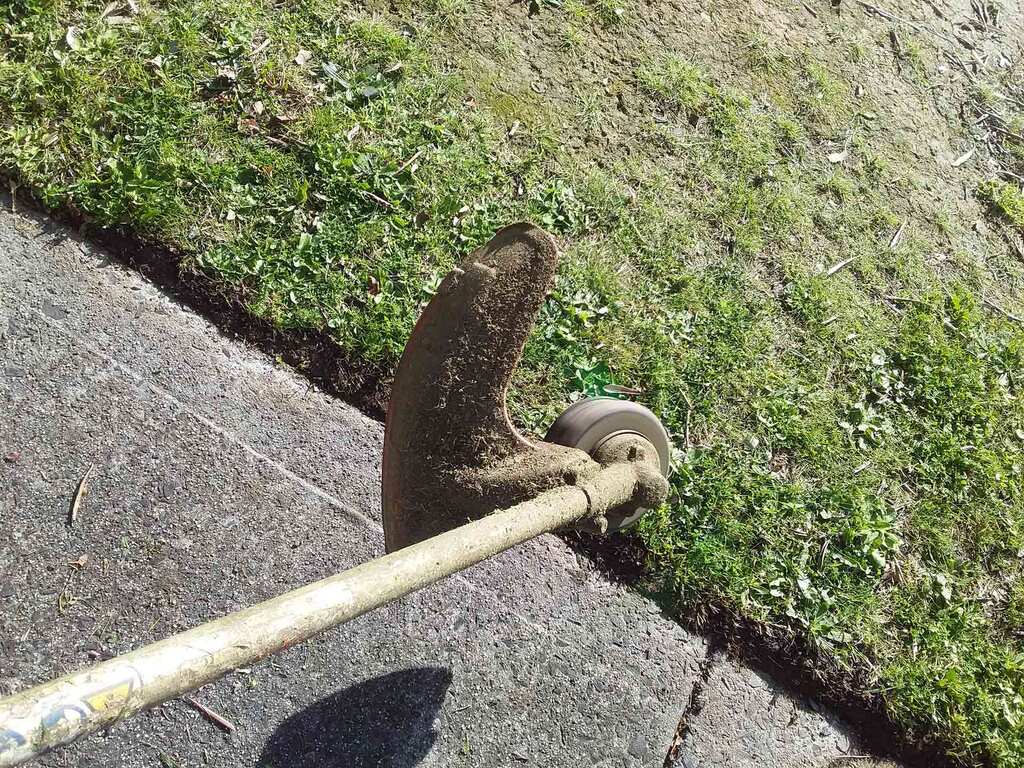
You can’t see the cord, but it acts like a cutting disc. Notice how high the head is from the curb: this is how far this tool is able to cut when using the tip of the cord. This nature strip is a little bit thatched, by the way. Image via Plants Grow Here.
Cord Length
The length of the cord you’re running makes a huge difference to your cut and the way the machine operates.
It’s easy to burn the cord too low which will make cutting difficult, and if you burn it right back one end of the cord may jump back into the head or become so hot that it melts and fuses the cord within the head making it harder to unravel. This causes a loss of time while you fix the problem.
Whips come with a guard down near the head that provides a bit of protection from projectiles coming back and hitting the operator. This guard usually has a small blade on it that cuts your cord when it gets to a certain length.
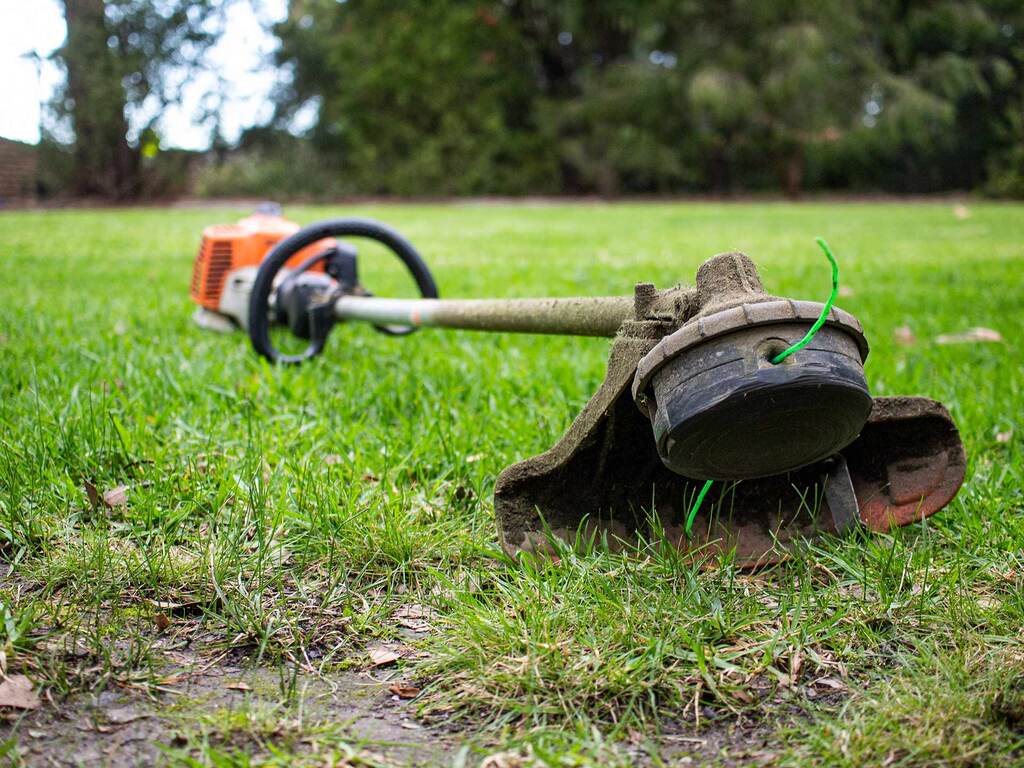
Stihl brushcutter with a ring grip, guard and blade, as well as a Speed Feed head and Trail Blazer cord. Image via Plants Grow Here.
As the cord becomes too long, the engine will struggle and you won’t be able to get as much power. The blade on the guard keeps the cord the right length, and once it gets a couple of centimetres shorter than its “full” or “ideal” length (as dictated by the guard blade) you may want to bump the head and extend the cord.
If you’ve removed the guard, you’ll need to feel for how long the whip likes to keep the cord, and at what point it starts to struggle. You can keep a pair of secateurs in your pocket to trim the cord or burn it off against the curb or a bolder while being careful not to make any marks that are noticeable.
Just keep in mind that the guard is there to protect you, and you might not be able to bring a guard-less whip onto a commercial job for health and safety reasons. You may also get yourself into trouble with WorkSafe or be denied an insurance payout if you remove guards from tools and there is an accident.
I wouldn’t personally remove a guard but I do know that many maintenance operators do. For goodness’ sake, at least make sure you’re wearing safety glasses that are rated for commercial use. Your Ray Bans might make you look cool (or make you look like a try-hard) but they probably won’t prevent a stone from hitting your eye from the side or even cracking through the glass itself and hitting you from straight-on.
It Shoots To The Left
Commercial brushcutters turn anti-clockwise, which means that they push debris to your left as you work.
I’ve used a whip that spun the opposite direction once and I absolutely hated it. It had one of those bent shafts that are difficult to work with if you’re used to the straight shaft of most commercial whips and it was just an overall goofy machine too use. I’m not recommending you buy a whip like this, but if your whip spins clockwise obviously you’re pushing debris to your right.
Whichever direction you’re shooting to, always keep it in the back of your mind as you work so you can avoid spraying debris into windows, people and traffic as well as onto areas that may be hard to clean, such as a white wall or a shiny new car.
This may mean re-thinking the way you work your way around a site in order to flick the grass away from the pool, wet paint or sandpit instead of pushing debris into it.
If you’re whipping before mowing, you can go anti-clockwise so that you push the debris onto the lawn for the mower to either catch or mulch.
Whipping Before vs. After Mowing
If you’re whipping after the lawn has been mowed, you might want to work your way around the lawn clockwise in order to push debris out to the edges.
Otherwise, you will push debris onto the freshly mowed grass and make it look dirty. The exception would be if you want to avoid spraying into a pool or a shrub. In this case, you can keep the revs low and tickle anti clockwise.
A second mowing may be required to clean the debris, so in this case you would have been better of whipping before mowing or working the other way around the property.
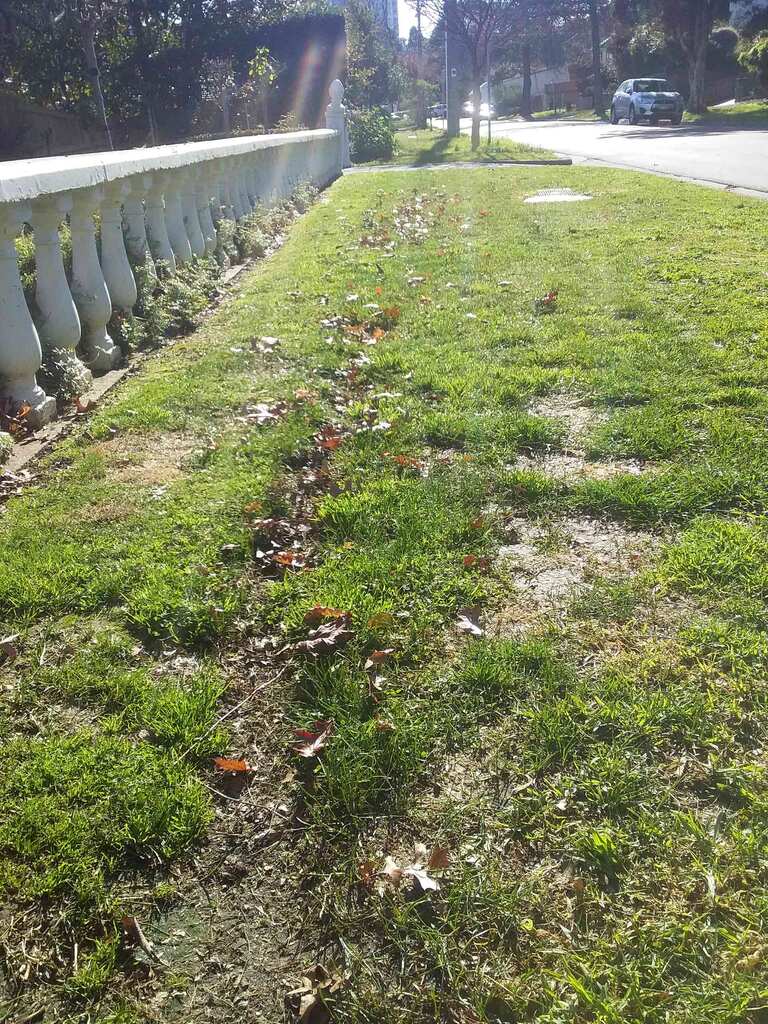
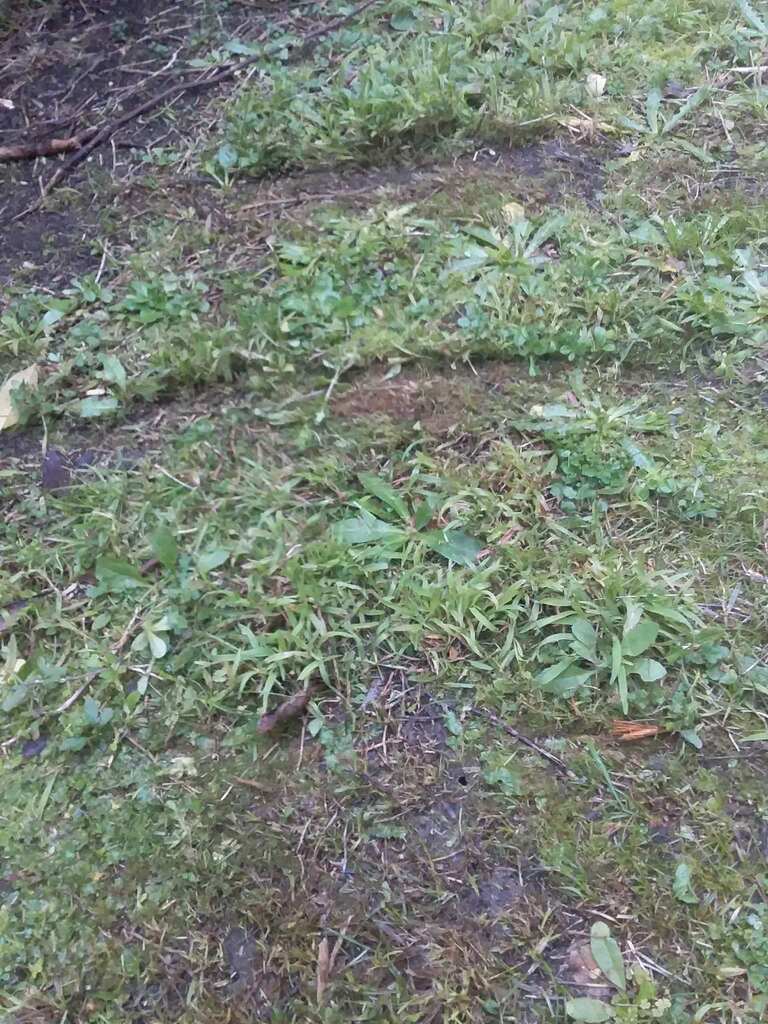
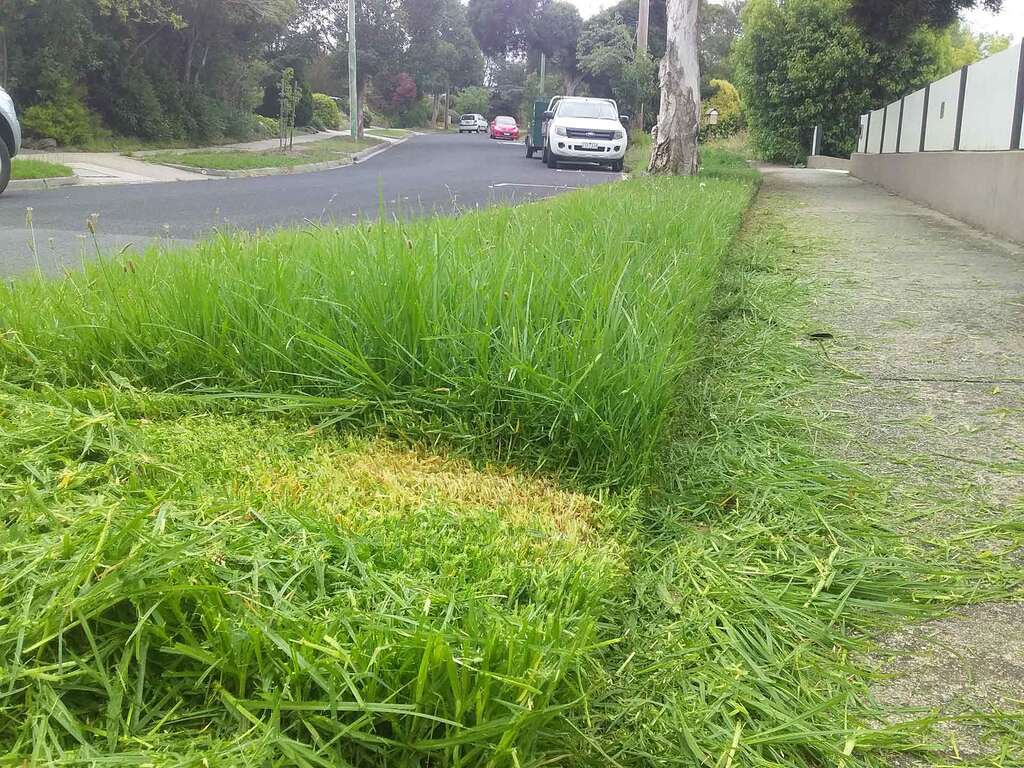
In this image, the brushcutter operator worked their way along the fence on the left towards us, which is anti-clockwise. Notice how all the dry leaves that were along that fenceline trapped under the seaside daisy bushes has been pushed back onto the lawn which has already been mown. Now this patch has to be mown again. Image via Plants Grow Here.
The Dead Walk
Work experience kids and inexperienced gardeners do the “dead walk”.
The dead walk (or the useless walk) is when you leave an area without completing it, even though you could have, so that you have to come back later and do it. This basically means you’re doubling the amount of walking you have to do.
You can avoid the dead walk by whipping in a circle around the site. As you walk past light posts, trees, etc., you should quickly whip around them otherwise you will have to come all the way back at the end.
Doing the dead walk is great if you’re trying to increase your number of steps in a day, but bad if you want to be an efficient worker or have better things to do than walk back and forth without purpose.
This goes for mowing and blowing too: don’t walk up the other end of the property and start the machine; start it at the work vehicle and make your way around the site in a loop, ending back at the vehicle.
Flat Whipping
Flat cuts are where you keep the cutting disc horizontal, for example against a wall along the lawn perimeter, or you can also flat whip a whole section of lawn.
The first thing you need to do is keep the cutting disc totally flat, not on an angle. If you tilt the head forward or to the side on an angle, this will be reflected in your finish. Sometimes when a gardener has flat whipped a whole patch, you can see the “waves” they’ve created with their tilted angle.
You’ll often see this in the shady areas that aren’t worth mowing around tree roots or narrow spaces between the house and a fence.
Surf’s up, dude. Image via Plants Grow Here.
When cutting larger sections of lawn, focus on holding your position and using long strokes, instead of changing your angle often and using short strokes.
This method of whipping may be useful for cutting steep hills where mowers can’t reach. Try walking above and below the hill to reach as much as possible before walking on the steep hill itself, as walking on steep ground can be dangerous and hard on your joints (though admittedly may be pretty good for your muscles).
Don’t carve more grass than necessary. About 3-10cm (1-4 inches) is the ideal length for grass to be cut at, depending on the species. It’s less important to focus on cutting every leaf of grass or weed, and more important to look at the overall picture for a “sharp” finish on the job.
Whipping Thick Grass & Weeds
When you’re whipping thick grass, you need to get your revs (revolutions, or engine power) up before you put the head into the grass, so that the disc is already spinning. If you put the head into the long grass before putting your finger down on the trigger, the cord has no momentum and the engine struggles a bit more to get up to speed against the resistance provided by the grass.
Long grass can become woven into a thick mat with horizontal stalks as well as vertical ones which can make for a particularly difficult task when it comes to cutting. Cutting through a ground-covering vine can be just as tricky because even though you’re cutting them off at the base, there are still a whole heap of woven connections keeping the whole mat together.
You might try doing a vertical cut (as mentioned below) to separate the mat into sections. You can criss-cross the cuts so that you cut the mat into squares that you then simply carve out with a flat horizontal cut. For extremely long grasses and ground covers, you may want to do an initial horizontal cut to get the length down before cutting the grid.
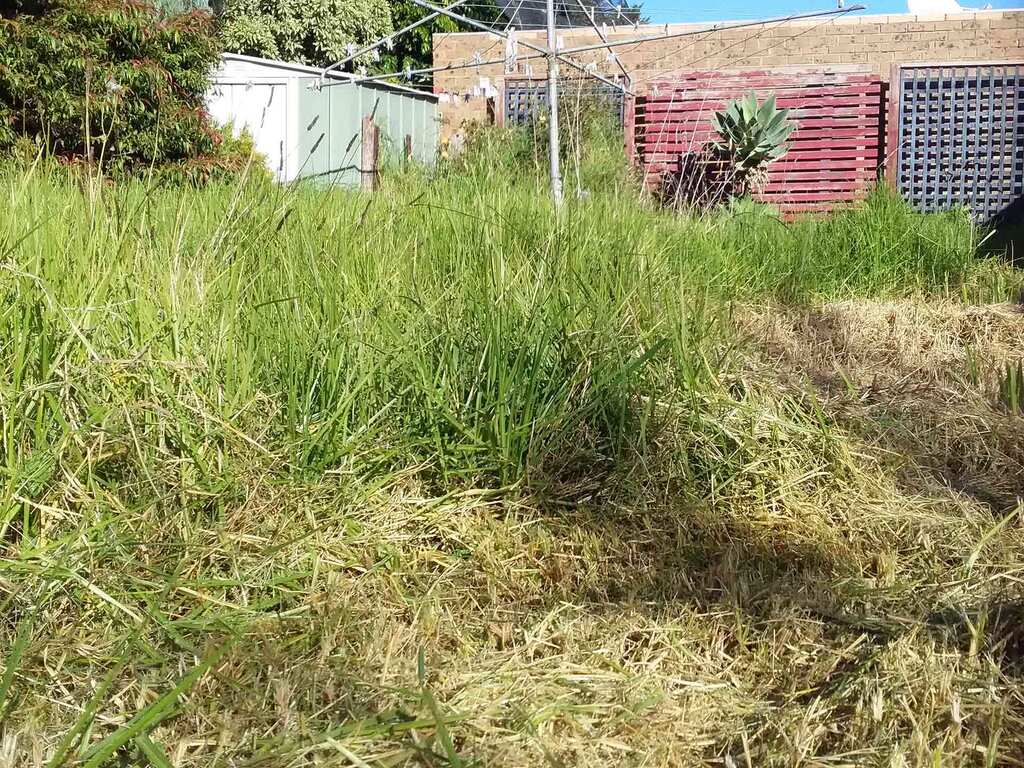
With a very long lawn, step one is to cut the length down. Image via Plants Grow Here.
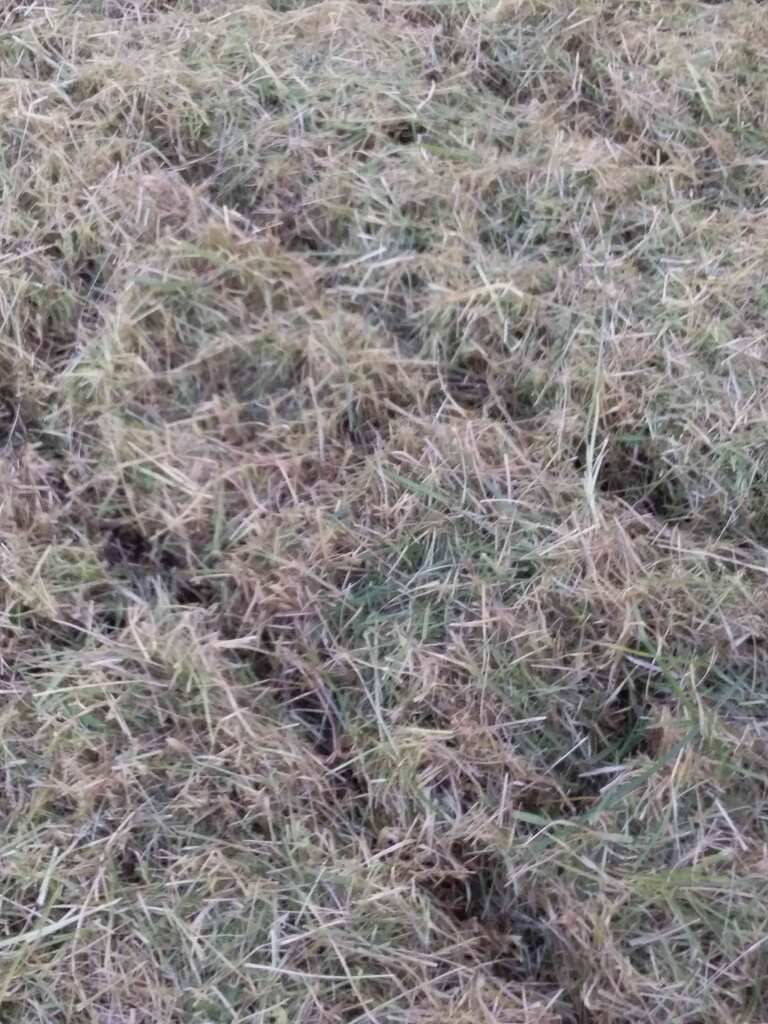
Step two is cut it into a grid. And step three is to cut horizontally again as low as possible. Image via Plants Grow Here.
Once you’ve cut the grids it’ll be a lot easier to trim down low to the ground. Also experiment with lifting and lowering the head as you cut through thick weeds and vine mats to dislodge the tangled mess and throw it away from where you’re trying to work as long as it’s safe to do so.
Straight Edges vs. 45
When it comes to whipping footpaths and other concrete edges, you have two choices: the straight edge or the 45.
A straight edge (a.k.a. the upright edge or vertical cut) is where you vertically cut the grass to create a thin and shallow trench (using only the very tips of the cord so as not to dig too deep or wide of a trench), usually between the lawn and a concrete edge. This is done by flipping the whip upside down or on the side, depending on what’s most comfortable for you.
A straight edge or vertical cut.
The vertical cut can also be used when you’re cutting vines up, or even to carve a plant away from a footpath, provided that the plant has soft stems. A good example of a plant that’s easily hedged with a whip would be seaside daisy or maybe even tender lavendar growth.
A forty-five, or angled cut, is where you slap the grass off the curb by holding the whip at an angle; it doesn’t have to be 45 degrees, this is just what we called it when I was learning and I like that name. It might be easier for you to do a cut like this if you aren’t confident enough to do an upright edge, but it probably won’t look as good as an upright.
You can walk in either direction using this angle.
Here is a 45 cut, where the whip is slapping the grass back off the concrete. You could be walking in either direction holding this angle. Image via Plants Grow Here.
Weeds In The Concrete
As you’re whipping, there are often going to be weeds (especially grasses) growing in the curbs, footpaths and concrete that can look a bit funny if you don’t address them.
It’s a bit like if you got a haircut and your barber missed a patch of hair hanging down over your ear.
The easiest thing you can do is simply whip them off so that your finish looks clean. You can also spray them with some glyphosate after blowing (blow before spraying to avoid glypho touching the wrong leaves).
If you’d like to learn more about weeds and herbicide options, you can view my posts on the subject here.
Hold Your Position
Whipping long concrete paths can be hard. The inexperienced gardener fights the whip, fights the curb, and fights the grass the whole way along the nature strip and their finished edge is patchy.
Remember it’s a disc.
Avoid the temptation to change your angle every few steps; what you want to do is find the correct angle for the cut and attempt to hold that angle for the whole strip.
When you find that right angle and hold it, it’s a great feeling. Your feet are moving, but you’re holding the whip steady and the line you’re cutting is neat. You’ll always have to stop here and there to get a bit that you missed, or cut around a tree, or to cut a weed poking through the footpath, but once you get the hang of it you’ll find your position again more and more quickly.
Experiment with different angles as you learn. Try to keep the spinning head as far away from where you’re trying to cut as possible and get a feel for where the invisible cutting disc can reach so that you’re cutting with the tip.
When To Slow It Down
When you’re working against something soft like a rendered wall, tree trunk or downpipe, you should drop the revs off and take the time to “tickle” around the obstacle with barely any power at all.
In this case, the cord may be floppy and you might not be using it as a disc. Remember, we’re just tickling around fragile surfaces.
Whoops-a-daisies! This rendered wall has been chipped, probably from a brushcutter. Image via Plants Grow Here.
Blowing With The Whip
If there’s a tiny bit of concrete out the back of a property, you can simply blow it off with the brushcutter after you’ve mown around it and cut the edges so you don’t need to walk all the way back with the blower.
Experiment with this; it isn’t too hard, but there’s a bit of an art to it.
Bullhorns Or Ring Grip
There are two main grip types for brushies: bullhorns and ring grips.
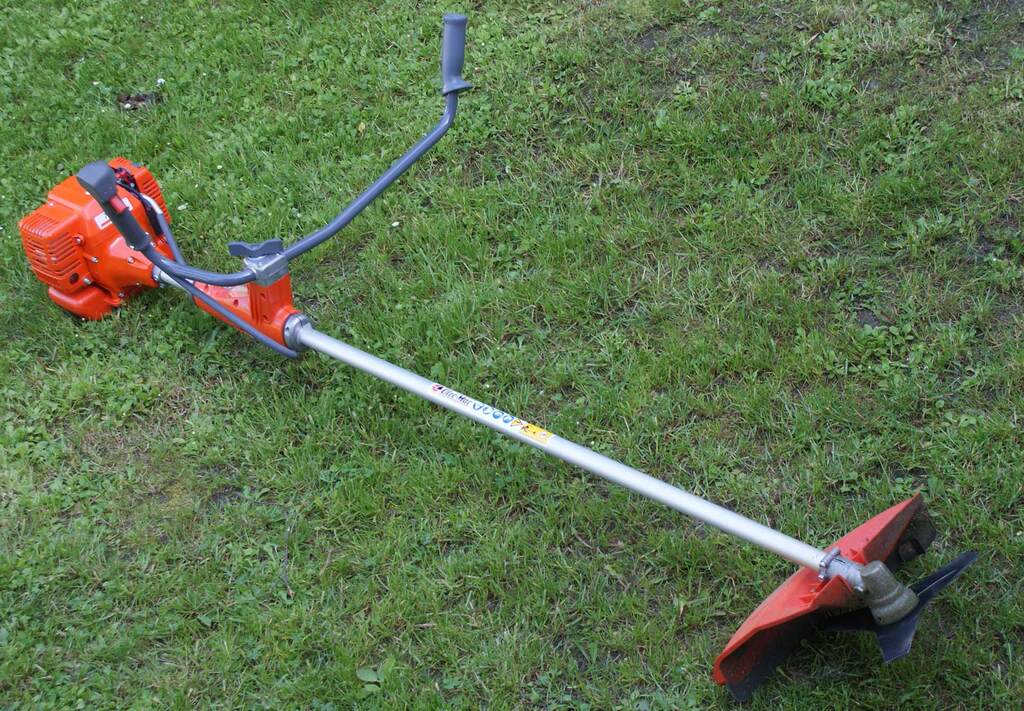
Brushcutter with bullhorns and blade attachment (unknown brand). Image source
A commercial Stihl dedicated (as opposed to combination) brushcutter with a ring grip, via Plants Grow Here.
Bullhorns are more ergonomically friendly in that they help you transfer the weight between the two handgrips that are spread apart and the shoulder strap.
Every gardener has their preference, but ring grips are by far the most common and are the type I prefer. These whips just have a ring (that doesn’t meet the whole way around at the bottom) for the front hand.
You can spin whips with a ring grip around with ease to do upright edging, as opposed to bullhorns which are bulky.
Straight Shaft Or Curved/Bent Shaft?
That’s easy: straight shaft.
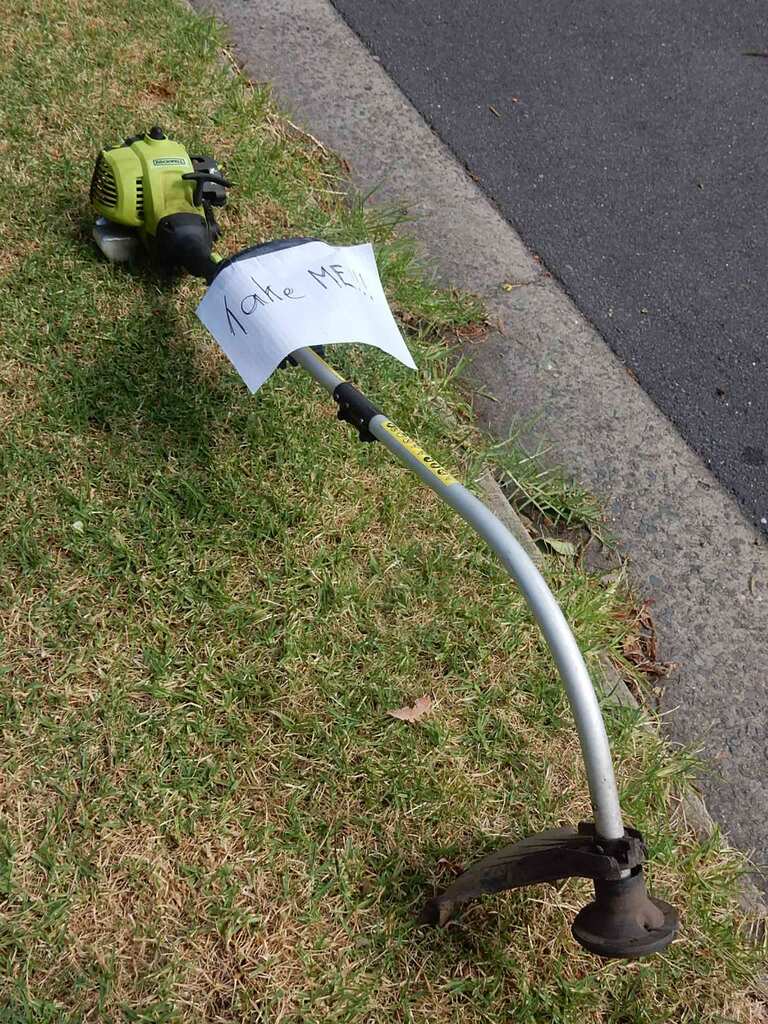
No thanks! Image source
Is The Brushcutter A Comfortable Machine To Use?
Absolutely, at least I believe so.
If you’re just whipping your own yard once a fortnight there should be no comfortability issues other than normal muscular fatigue. However, there is obviously some muscular conditioning that needs to occur if you’re going to be whipping as a full-time job.
When I first started working full-time as a gardener, I was quite unfit and weak having previously worked in an office. I started as a whip operator, and on the first day my hands were vibrating with pain after using the machine for 8 hours on council land including parks and median strips with only a half hour break and barely any travel time to recover.
This muscular vibrating, and sometimes downright shaking, of my hands kept up for at least the first month, at work and at home, which was quite uncomfortable.
Once my body became conditioned the pain went away, but over the last couple of years my wrists have become quite sore and I think I’ve discovered it’s because of the long-term damage done by the vibrations in the machine.
These days I use anti-vibration gloves because I’ve found this keeps the pain in my wrists away for the most part. There are soft gel patches on the palms of the gloves that absorb the worst of the vibrations so that your body doesn’t have to.
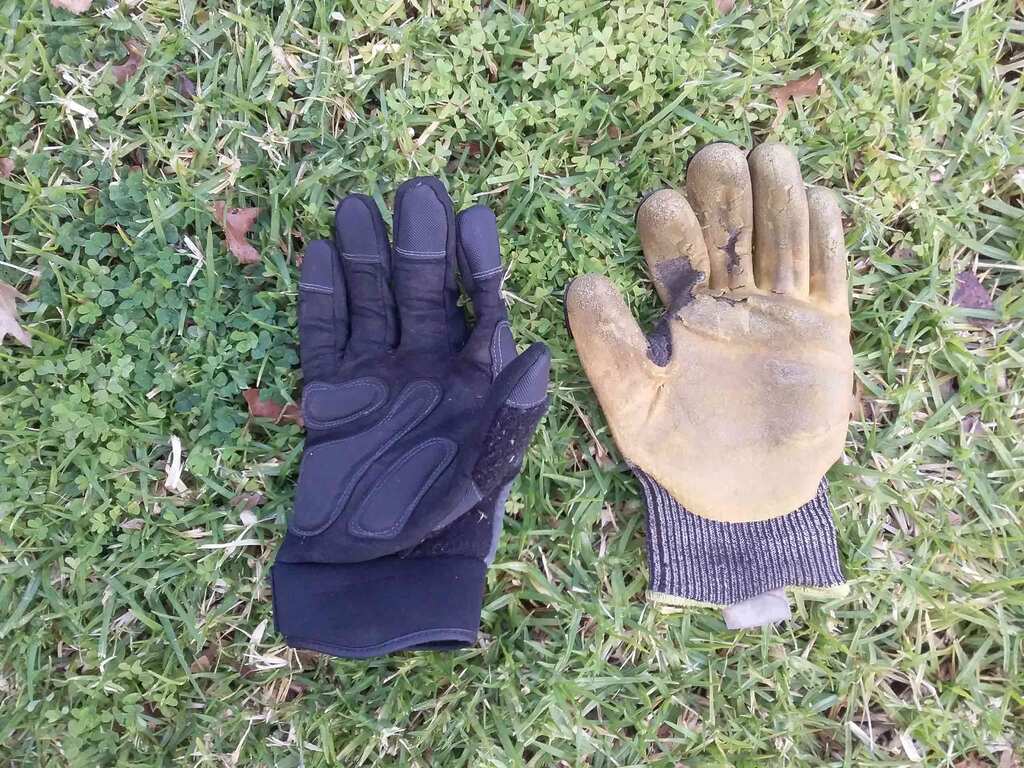
New and old: the yellow Ironclad brand gloves are nearly past their used by date, but my new Protector gloves don’t offer as much protection so I still prefer the Ironclad ones. Image via Plants Grow Here
I wish I’d known about this type of glove when I first started, so please learn from my mistakes and buy some as a preventative measure!
I would suggest that you also switch between mowing and whipping while you’re conditioning your body in order to allow your body to recover and minimise “the shakes”.
This may not be possible if you’re working with ride-on mower operators on parks like I was, in which case the only tasks are whipping and blowing and your muscles, tendons and nerves are in for a rough ride for at least a month or two.
You could do some weight training for strength and endurance in preparation if you know in advance you want to make the career shift.
How To Hold A Brushcutter Comfortably
It should be pretty effortless to use a brushcutter, assuming that you’ve been using the machine for a couple of months and you’re relatively fit to start with, and if it feels like you’re trying too hard it probably just means you haven’t found the right part of the cord to cut with, you haven’t found the correct angle to cut with, or you’re just holding it incorrectly.
You can use a good brushcutter with your arms pretty slack. Experiment with loosening your grip and let your arms hang a bit, rather than tensing up. Regularly check in with your hands and shoulders: loosey goosey, baby.
Mix up your grip as well. One moment you might have your hand wrapped around the grip, and the next it might be hanging off your fingers to change up the muscles you’re using.
There is a shoulder strap that comes with most whips you can use to take some of the weight off your arms if you need. I personally find the strap just gets in the way, but make sure you give it a go and see what you think.
You can also adjust the ring grip or bullhorn handle and move it forwards or backwards depending on your height and preference.
Switching It Up
Get used to working left-handed and right-handed, no matter what your preference is when you’re working with a ring grip whip. This will help you avoid long-term changes in your posture due to your spine always bending in a certain way, with one shoulder beneath the other.
When you’re working around a site clockwise the most natural position is to have your right hand back, and when you’re going around anti-clockwise the best position is to have your left hand back on the trigger.
It feels goofy when you’re using the machine on the opposite side than you’re used to, but I find that focusing on keeping your feet facing straight helps. Once your feet and hips are in line, the rest of your body falls into line as well.
Combination Machines vs. Dedicated Whips
Combination brushcutters have the option of swapping the brushcutter head out for other options like a pole hedger. These are awesome for a number of reasons.
Firstly, you can have access to a whip and a pole hedger for less money and they also take up less space than two separate machines.
Combination machines also help with avoiding downtime when your machines break down. A dedicated pole hedging machine won’t help if your dedicated whip breaks down, but if you had two combination machines you could use the second engine with your whip connection.
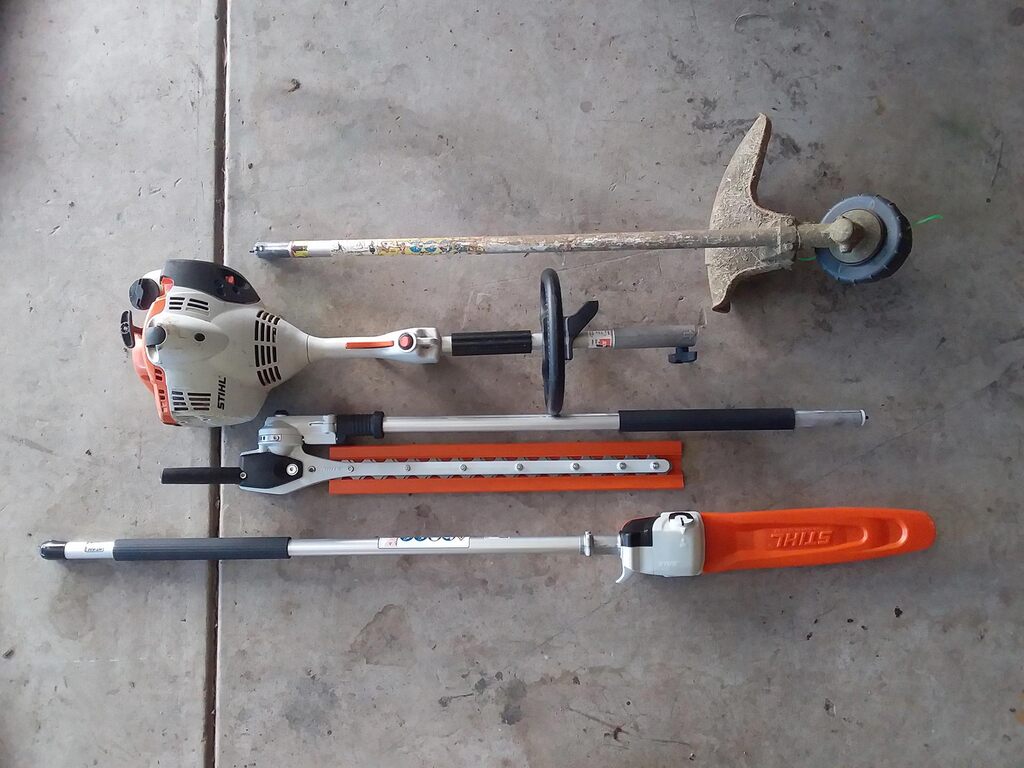
Stihl combination setup consisting of an engine and brushcutting, hedging and pole saw attachements. Image via Plants Grow Here.
Edging Alternatives
Edging machines such as the Atom edger are an alternative to using the whip to edge. The Atom edger is a petrol machine with a spinning metal disc that fits in against the concrete edge, and you stand behind wheeling it along the edge. There are other brands out there, but I’ve used the Atom machines and they’re great.
This kind of machine spits out less debris than a whip, so is awesome in terms of safety. As well as this, it’s awesome in the way that it easily severs old growth to reveal an edge that had become totally overgrown.
Your cut will also be perfectly straight and square to the concrete as opposed to using the cord, which will never be quite as perfectly square as an actual dedicated edger.
A more primitive version of this technology is also available where you just have a wheel, a steel disc, and a rod to hold and push with.
Trying to cut back old growth with a whip can be tiresome, especially if you don’t have a powerful engine or tough professional grade cord so these options are certainly worth looking into.
Some brands even have an attachment you can put on your combination engine with the wheel and disc, so you can have a dedicated edging head for a combination machine (mentioned above).
The only downside is that it is an additional tool to spend money on that occupies space, and it also takes longer to walk back to the vehicle or garage and grab it out to use.
Push Mow
There are three main methods of mowing grass: catching, mulching and slashing. All three methods have their place and their own benefits for different situations.
Before you begin, consider the job itself, and the desired finish you and your customer are looking for. Are you slashing down the grass on a building site, or are you mowing for an extremely fussy customer?
Sometimes, catching long grass may not fit within the quote, and that’s fine as long as you discuss this with the customer prior to starting. If there’s going to be an additional charge, it’s always good to speak with the customer before you start work for obvious reasons
You can mow up many types of fallen leaves, though some are more difficult than others. Sticks and large items need to be removed by hand. If you’re working as a gardener on a customer’s property and it’s just three or four sticks, consider just picking them up for free, but 10 minutes of extra work would certainly need to be accounted for within the quote and discussed with the customer.
Mulch Mowing
This is my personal favourite way to mow, and it’s probably the best method for the lazy and educated gardener.
Mulch mowing doesn’t allow grass to exit through a chute at the side or the back; instead it chops it finely and spits it directly down. This is an absolutely awesome source of organic fertiliser to feed your lawn with for free. (You can read more about organic fertilisers through my blog post.)
This method of mowing is great because it prevents removing the soil’s nutrients that the plant absorbs over time. These nutrients are pushed back down for organisms to return into the soil, along with some additional carbon that the plant accumulated through photosynthesis.

No catcher and no open chute: it’s a dedicated mulch mower. Image via Plants Grow Here.
Mowing with a mulching deck is recommend when you’re cutting less than a third of the lawn height and the grass is dry. This helps avoid getting a clogged deck (a.k.a. the bowl, where the blades spin within), which will increase the likelihood you’re going to be leaving clumps of grass all over the lawn.
Some leaves mulch great and other leaves don’t mulch very well at all. Some may cause the lawn to look brown if they aren’t successfully chopped finely and pushed below the lawn top, or if there are simply too many of them. Mowing several times over may or may not help.
Healthy soil and having a lot of soil organisms can help break old material down to prevent a build-up. You can read how to amend your soil quality and encourage soil-dwellers by browsing some of my posts on the topic here.
Sticks any larger than the petiole connecting the leaf to the branch also probably won’t mulch very well so may need to be raked or picked up, depending on the level of service you’re offering the customer.
Thicker and longer grasses also may show debris above the lawn top even when you’re only cutting a third off.
This is especially likely to happen if the lawn is thatched, meaning that grass material, both living and dead, are accumulating more quickly than they are decaying, and creating a thickly woven mat.
What this means is that the grass may be raised above the soil quite high, causing the grass to feel spongy.
Increasing soil health and soil biodiversity can help prevent a thatching issue and there are methods of “de-thatching” once you already have the problem that involve breaking the mat apart and taking some of the material away.
Another reason debris may be showing on top of the lawn, other than the grass being too long, is that your mulching deck may be clogged and/or the grass may be wet. More on this later on.
There are dedicated mulching mowers, and some catching mowers come with a mulching attachment to plug the chute. However, a truly good mulching mower has a nice, deep bowl for the grass to roll around and become desiccated before being spat out.
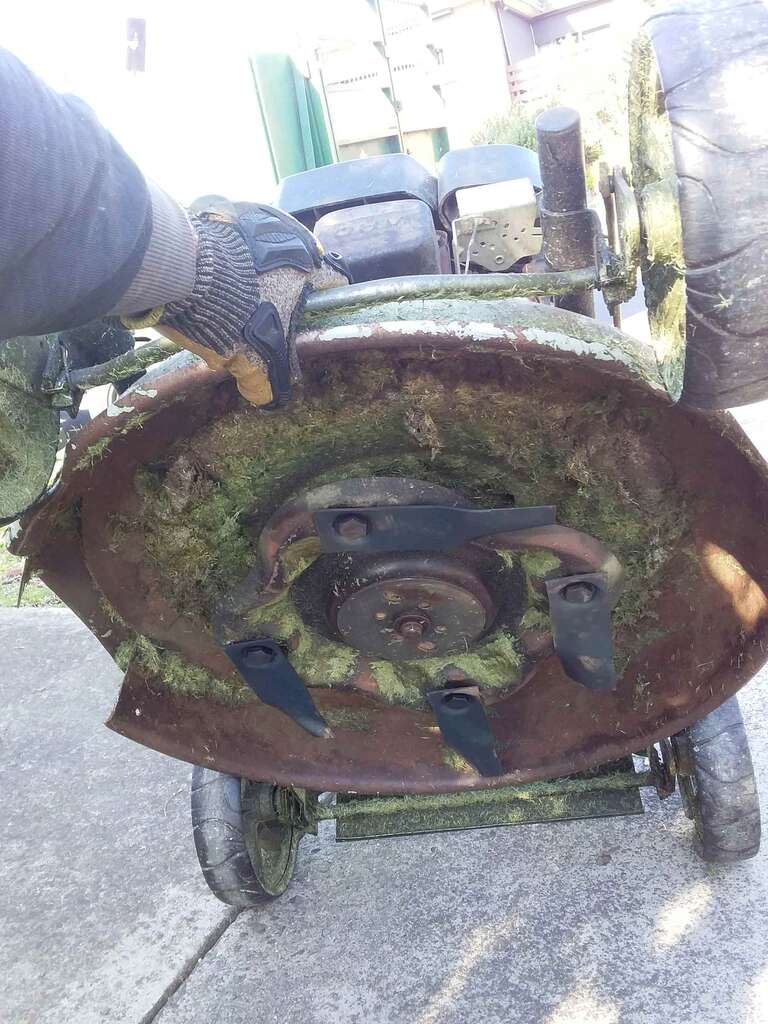
The bowl of a dedicated mulch mowing deck is generally a bit deeper than a side chute or catch mower. This one has the option of attaching a side chute for thicker grass. Because of the deep bowl, mulch decks aren’t as good at side throwing as dedicated slashers. Image via Plants Grow Here.
Be aware that there may be clippings that get dragged into the house or pool if you walk on the lawn with wet feet which the clippings stick to.
Side Throwing
If the grass is too long to mulch, you might want to side throw it with a mower that has a side chute that throws grass out. This means the bowl doesn’t get clogged as easily as mulching or catching.
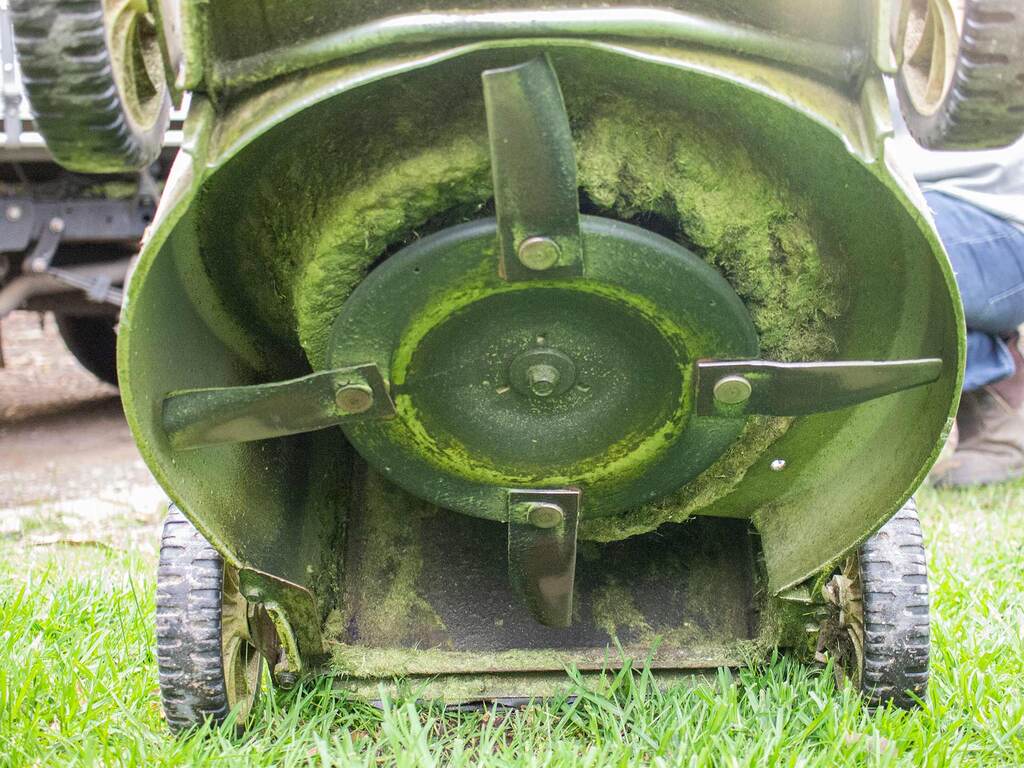
A dedicated side throwing bowl tends to be shallower than a mulching bowl. This one isn’t clogged, but there is a little bit of dry grass and mud that could be cleaned out. See the flutes, which are the curved part that have a fanning effect which pushes the grass out of the side chute. Image via Plants Grow Here.
Be incredibly careful with side throwers, because they are really good at smashing windows and making people blind. They’re also great at painting things green with grass so take care and avoid pointing the chute towards people, windows, walls, fences, letterboxes, etc. Always ensure the guard is attached to the side chute.
Catching
A catch mower is similar to a side throw mower in that it has a chute the grass is pushed out of, however this chute is usually at the back and there is a bag to catch the grass clippings.
This is a catch mower deck with the back flap down. The fanning effect pushes the grass anti-clockwise facing from this direction; notice how the bowl encourages this. Image via Plants Grow Here.
The clippings you collect can be placed in your green bin if your local council collects green waste; alternatively you can decant them into larger bags (wool bags are great) and take them to the tip once you have a full trailer load.
Basically, you want to take the least amount of trips to the tip as possible; it might not be a good idea to go once a week with half a load unless you need an empty load for a big gardening job. This is the same principle as the “dead walk” discussed above.
This is a good way to provide an excellent aesthetic finish on your lawns, but when you take away the clippings from the lawn, you are taking away energy and nutrients that the lawn has spent building its body, and dumping it where it’s useless.
So if you’re going to catch mow, make sure you top-dress with some organic fertiliser like compost or manure to replenish what you’re taking away.
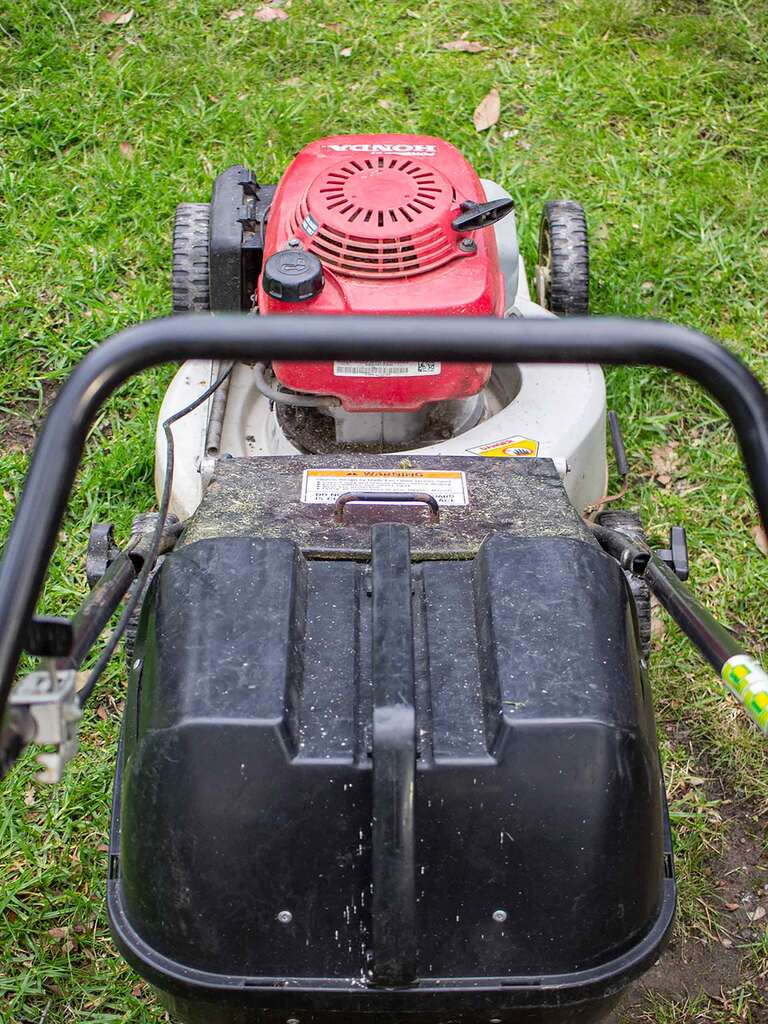
Top view of a Honda catch mower via Plants Grow Here.
Keep Your Toe On The Line
You want to keep it in your mind that you’re making the least work for the whipper snipper operator as possible. This means pushing the mower under the hard-to-reach parts, thinking ahead, and staying out of their way.
It also means keeping two wheels on the curb of the nature strip (while being careful not to scalp the grass) to ensure they don’t have to come back to horizontally whip a mohawk along the straight edge. Which means avoiding extra work on each job, amounting to an earlier finish to the workday.
Kiss that curb! Image via Plants Grow Here
Mowing Patterns
There are two main methods to make your way around a lawn with a mower: up & back, and spirals. There’s no right or wrong way to do it, but people do have their own preferences.
The up & back method is where you go up and back, one strip at a time, until you’ve done the whole lawn. This is the method I use, but I do 3 laps around the perimeter to start with so that I have a bit of room to make my turns.
The spiral method is where you simply spiral your way from the perimeter inwards to the center. The only thing is you have to walk the mower out of the centre which can leave wheel marks that contrast against your spiral.
Either way can be done on any lawn no matter the shape, but some lawns need to be broken into sections. Plan your route around a site in your mind before you start; it’s so easy to lose time doing things in an illogical way.
I once saw a person mow their nature strip in front of their house perpendicular to the front fence, instead of going parallel. Sometimes I think about him still and wonder why.
If you’re side throwing, continuously throwing into the middle as you sprial inwards causes an accumulation of cut grass that you have to mow over and over again.
When the grass is very long it can help to start in the middle and work your way out when side throwing, while throwing towards the middle so that you aren’t accumulating a grass pile as you work your way to the perimeter.
Should I Cut The Lawn Short Or Tall?
Lawns like to be kept at a height of 3-10cm (1-4 inches) depending on the species and your personal preference, so there is a lot of differentiation there.
Lawns only really like to have about one-third of their length cut off on any single mow, or they may get stressed. They certainly don’t like being cut past their leaves and into leafless stems.
There is a lawn myth that cutting the lawn shorter means that you’ll have to cut it less often. This is not in fact the case. It just means that the starting point is lower, but it will still look just as scrappy given a bit of time for the leaves of the grasses and weeds to grow.
Each grass cultivar has its own preferences, so taking note of these when purchasing your turf, or having your grass types identified by a gardener and researching their needs can help you decide if you’d like to go long or short.
I like to cut grass a bit higher, say 5-7 cm for kaikuyu grass, because I think it looks nicer, feels nicer to walk on with shoes or bare feet, and is healthier for the grass as they’ve got plenty of foliage to photosynthesise with.
Some weed flowers live on, like some of the shorter clover, dandelions and others. This provides food for bees and other beneficials, which require flowers all year long or they start to disappear.
You might like to know that keeping long grass does also help block out new weeds from being able to take root. It won’t stop all weeds, but if you hate weeds it’s good to know that longer grass is one method to slow them down.
Most grasses struggle if they’re cut too low, which makes it hard for them to hold their own real estate providing an opportunity for colonising weeds to take over.
I reckon it also just looks uglier to have short grass than a nice, lush, thick and vibrant taller lawn, especially if your property has any lumps and bumps.
How Often To Cut
The grass will tell you when it’s time to cut: before it has grown one third taller since the last cut. The more often you cut, the better.
Mowing regularly causes grass to respond by putting growth into new stems to take up the light closer to the ground, seeing as growing higher isn’t being rewarded.
Commercial mowing businesses tend to run on a schedule. If you can have your customers booked in regularly it’s much easier to create a run sheet for every day (even though some customers like to call up at midnight before you’re due to mow and reschedule).
The best way to run a mowing business is when you tell them when it needs to be cut, not the other way around, even if convincing customers of this can take some skill.
Some lawns are on a 4 weekly schedule, some on 3 weekly, some 2, and sometimes you need to do weekly cuts, for example during the Brisbane tropical spring and summer when the grass just goes crazy.
Mowing Overgrown Grass
Perennial grass types (those lasting for years, as opposed to seasonal annual grasses) love to be regularly maintained. Out in the grassy fields of nature, there are often animals that feed on the grass and keep it low.
If you encounter overgrown grass where intend to take off more than a third of the height, you need to make the decision about whether you’re going to scalp the grass to get it under control quickly, or whether you’re going to take the time to get it looking as good as possible.
Cutting into the brown part of the grass, where the stalks is exposed. Image via Plants Grow Here.
The ideal method of cutting grass is to cut only one third of the height of the grass on the first cut to reduce stress on the plant.
To get the height down you can do a series of mows, each one lower than the previous mow. You could do one or two mows per week depending on the season and type of grass.
This method is pretty time consuming, so you may choose to cut a corner and just slash it down quickly for the first mow. You might do this for a number of reasons including keeping costs down for the customer or fitting the job into your busy schedule. Discuss this with the client.
Some grass types can bounce back easily after being cut into the brown, and other grasses can’t live without some greenery. You need to research your particular lawn type.
A mulching or catching mower may struggle to cope with extremely long grass, so you might consider either side throwing or take the catcher off the catch mower and using it with the back flap down.
Never strap the back flap up when using a catch mower without the catcher, because any stones, debris or dog poo are directed straight at you.
You can rake the cut grass up and bin it, or leave it on the top of the lawn as long as you understand it’s going to look ugly and may or may not decompose easily depending on the amount of grass and the amount of clumping.
A second mowing over may be appropriate, or you can take a whip to any parts that have been teased up during the raking process or weren’t cut properly.
Another way to tackle long grass is to start by flat-whipping the long grass down, raking up the excess, and then mulch/catch mowing over it all once more to finish the job.
Mowing In The Wet
Moisture from rain, sprinklers or morning dew doesn’t provide the best mowing conditions, especially if you’re mulch mowing.
It encourages grass to form clumps which are harder for microbes to decompose and may end up sitting there for a long time. They look pretty ugly after they’ve died and are browning off on top of the grass until the next cut, too.
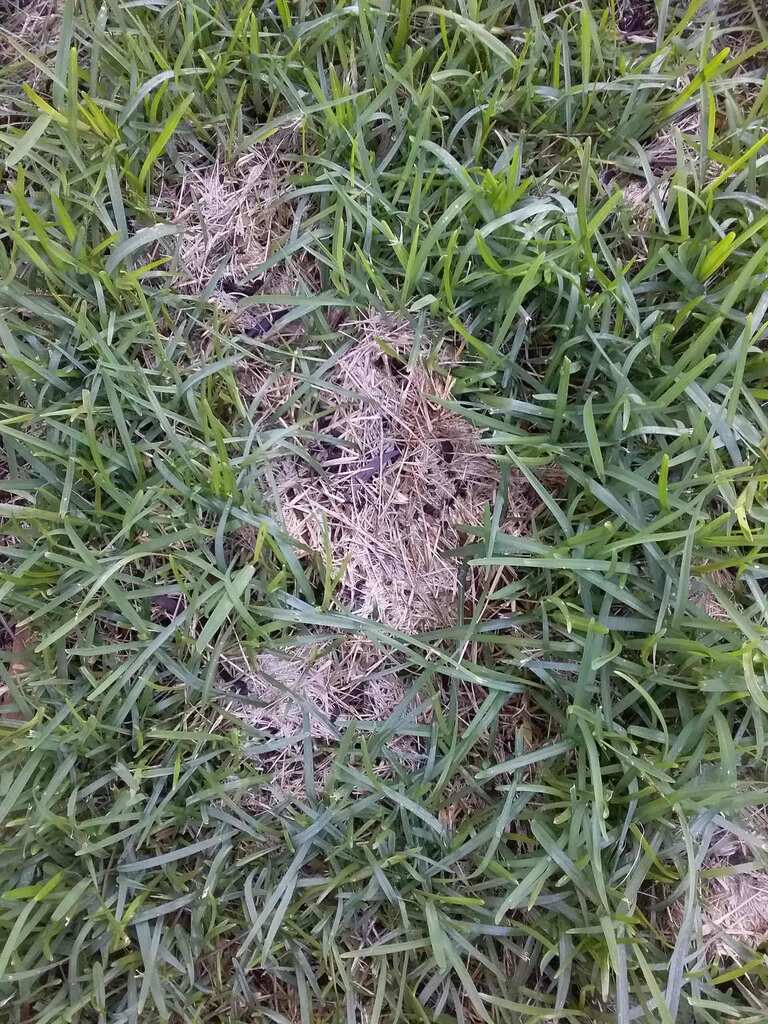
This clump of grass has been sitting for weeks between cuts. It’s blocking the grass beneath from sunlight and may or may not be sufficiently broken apart this visit. Image vie Plants Grow Here.
The first few lawns of the day might have dew, in which case you can give them a good blow down which gets rid of some of the moisture, though there will still be a little bit.
It pays to keep in mind which lawns you work on when there’s likely to be moisture; maybe leave the thicker lawns until it’s completely dry.
Keep Your Bowl Clean
When there’s moisture around, the grass can have a tendency to stick to the bowl after they’re cut, reducing the amount of space and making it harder for the mower to mulch, side throw or catch.
This clogging can also take place when you’re mowing certain juicy weeds and will leave dead clumps.
The best way to clean the bowl it is to tilt the mower back instead of to the side, because this can help avoid flooding the engine with petrol. Grab a stick and scour away. Using your hands leaves you open to cuts, potentially nasty ones.
Obviously all switches are to be disengaged when you do this. You can kick start a mower engine by pushing the blades if the switch is on.
You can also spray the bowl out with a hose from below, and some decks even have an attachment for a hose to clip into the top and wash with the engine on and the blades spinning.
Mohawks & Missed Bits
When you’re mowing, it’s pretty easy to miss bits and pieces, such as leaving a mohawk where you’ve done a mowing line slightly too far from the previous line and left a line of uncut grass that looks like a mohawk hairstyle.

Check out that mohawk, via Plants Grow Here.
Paspalum grass and plantain flower stalks are examples of plants that are easily missed, because the mower can fold them down under the wheels so they remain uncut by the blades. You can hit these missed bits with the mower or with the whip but often you only notice the stalks that have poked back up when you’ve already packed the tools away unless you make a conscious effort to check your work before walking away.
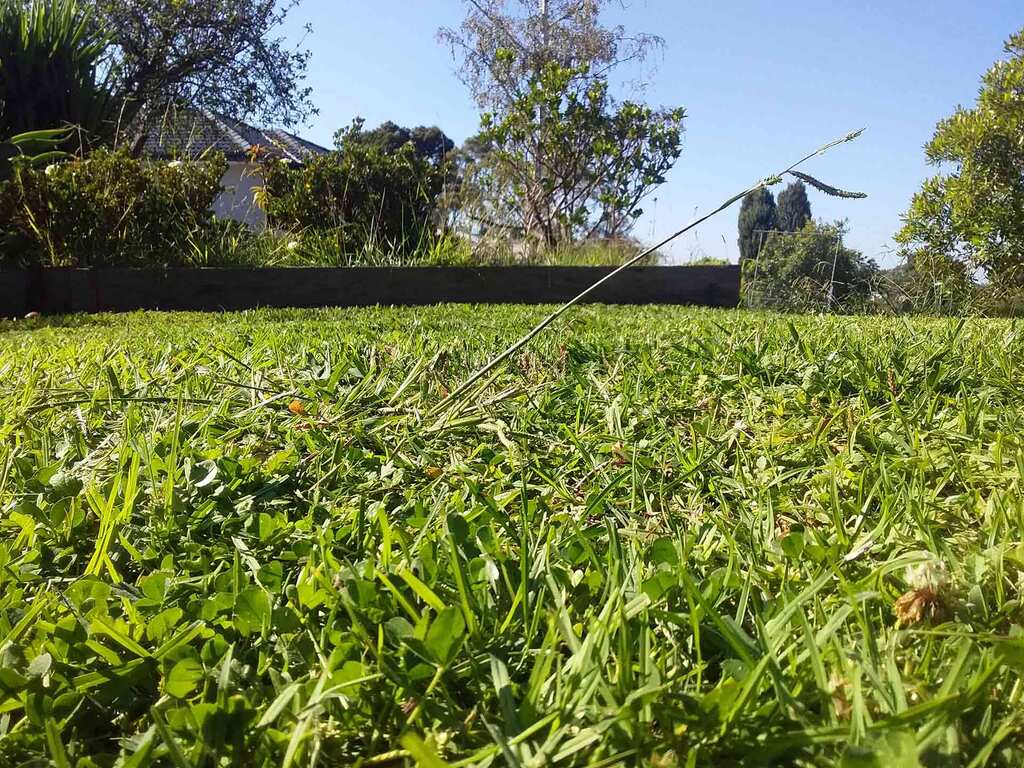
A paspalum stalk might only be visible from certain angles. Image via Plants Grow Here.
Keep Your Blades Sharp & Flutes In Order
Sharp blades make life easy for you: there are less weed heads that escape being cut and the overall finish is cleaner. Dull blades leave a more ragged, torn finish on the individual grass blades.
You can sharpen your blades yourself with an angle grinder, but if you aren’t confident with this you can have your local mower shop do it for you. Consider purchasing a second set of blades to use while you leave your dull blades with the shop.
The curved parts of the blade are called the flutes, and they magnify the fanning effect of the blades, creating movement to pulverise the grass in a mulching mower or push the grass up into the catching bag.
These flutes wear down over time due to the effects of friction with sand and grass. You’ll really notice the loss of the fanning effect when you’re catch mowing and can only fill half a bag before needing to empty the catcher.
Blow
Now that you know how to make the mess, you need to know how to clean it all up. Most of the time you will be using a blower vacuum, either petrol or electric, backpack or hand-held.
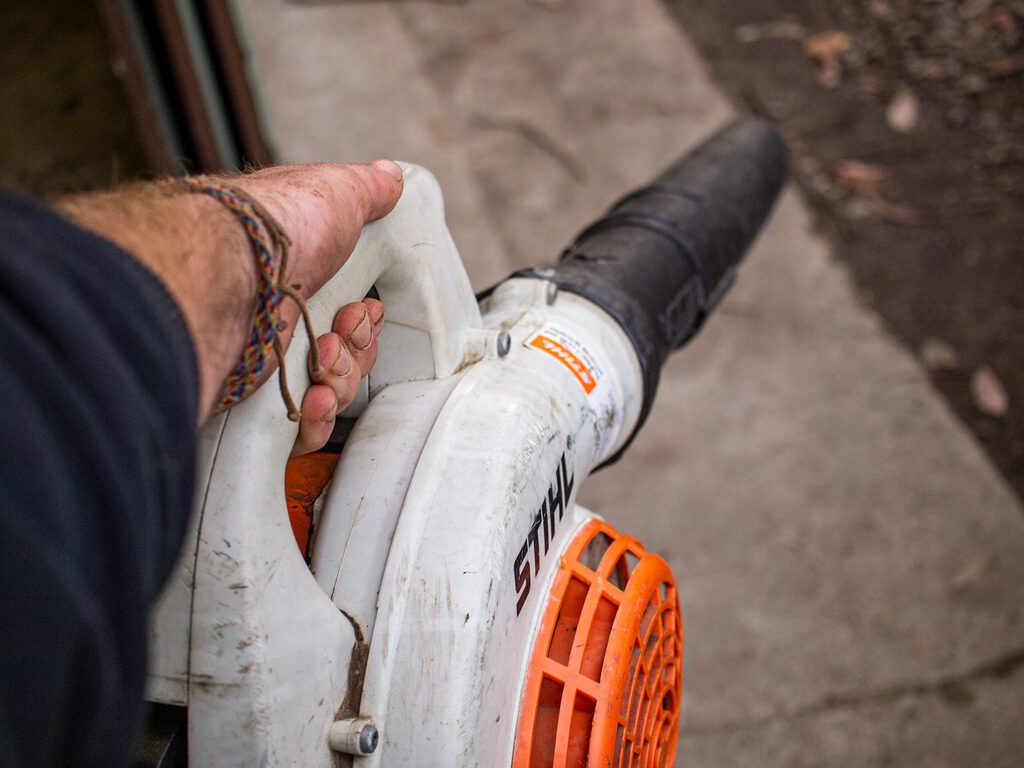
A Stihl hand-held blower via Plants Grow Here.
Operating The Machine
Amateurs keep pressing the trigger when they should just hold it down. There is a time to take your finger off the trigger, but see if you can keep the throttle fully pushed down for longer while still being efficient.
Pay special attention to nooks and obstacles (like pot plants, seating areas, BBQs, etc.) where leaves and dust can collect. Amateurs leave these bits, while pros clean them. It’s just shoddy workmanship to miss stuff like this and it doesn’t take that much longer to do it properly.
You’re using a stream of air to sweep debris where you want it to go. Sweep it from side to side as you work your way down the footpath. Try not to overthink it.
Don’t push autumn leaves and debris onto a freshly mown lawn or clean mulch, instead try to hide them under a bush (if there is only a small amount) or pick them up and bin the bulk of it. Pushing grass clippings onto the lawn is fine as long as you can hide them.
The air gets filled with dust and as you blow, so it pays to look back over your work and hit it again lightly after a few seconds’ time once the dust has settled.
Using The Blower To Clean Leaves, Clumps & Clippings On The Lawn
Sometimes, especially when you have a lot of leaves, wet grass or long grass, you may end up with a bit of residue left on your lawn after you’ve mowed.
This is most common when you’ve mulch mowed or side thrown, however is also possible with caught lawns. Hide this residue with a blower under the lawn surface, a bush, or again rake the bulk up if necessary.
Backpack Blowers vs. Handheld
Backpack blowers are often more powerful than handheld blowers and may be easier on your arms if they aren’t conditioned to using handhelds. The downside is that they are bulky, and by the time you’ve started a backpack blower your teammate has already started blowing a few metres down the path with their handheld.
Where backpacks really shine, aside from when you find handhelds uncomfortable, is when you’re doing a large concrete space or lawn. Their extra power just makes large areas so much easier.
Hand-held blowers are slightly quicker to grab out of the ute and shine on a normal-sized residential property or a footpath.
A lot of the time, a crew of two gardeners will have two blowers anyway, so why not mix it up and have both types in the same vehicle?
Go
What are you waiting for? Don’t stand around and have a chat, it’s time to pack the ute up and move on to the next job. So much time can be wasted doing nothing, so save that conversation for the drive to the next job with one hand on the steering wheel and a 7 Eleven coffee in the other.
However, there are just a few more things that you really should have known before you even start the job.
Petrol
4 stroke machines such as most mowers take unleaded petrol, but machines with a 2 stroke engine (including most, though not all whips, blowers and hedgers) require a two stroke oil to be mixed in.
Your 2 stroke oil will have a rate on the label you need to mix at. For example, say you have a straight 2 stroke oil with a rate of 50:1. You would put 100mL into 5L of unleaded petrol, or 200mL into 10L.
It’s crucial to mark your fuels, whether that’s with a label or with differently coloured jerry cans.
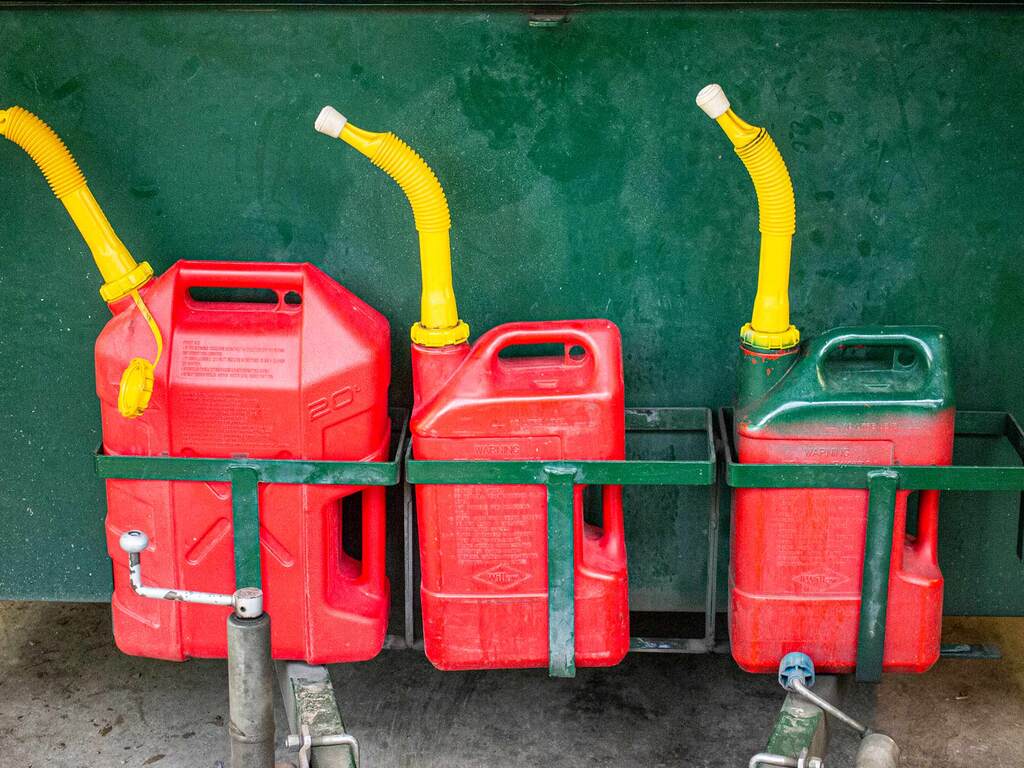
20L and 10L jerry cans with four stroke unleaded fuel, and a 10L jerry with 2 stroke marked with green paint. Image via Plants Grow Here.
Sadly, I have personally killed two petrol hedgers by putting straight unleaded fuel into two stroke machines. Initially they worked fine, then they started to get hot and I noticed grease coming out of the joins, and then the machine just freezes, never to be reawaken. It’s devastating when it happens.
It’s okay to use 2 stroke mixed fuel in a petrol engine, but not the other way around. The 2 stroke oil does affect the way a 4 stroke engine runs, and you may get a bit of smoke but it doesn’t destroy the engine.
Choke
Your machine may have a choke switch with a symbol indicating a valve being closed. Choking your engine restricts the amount of air going into the engine so that the ratio of air to fuel is altered.
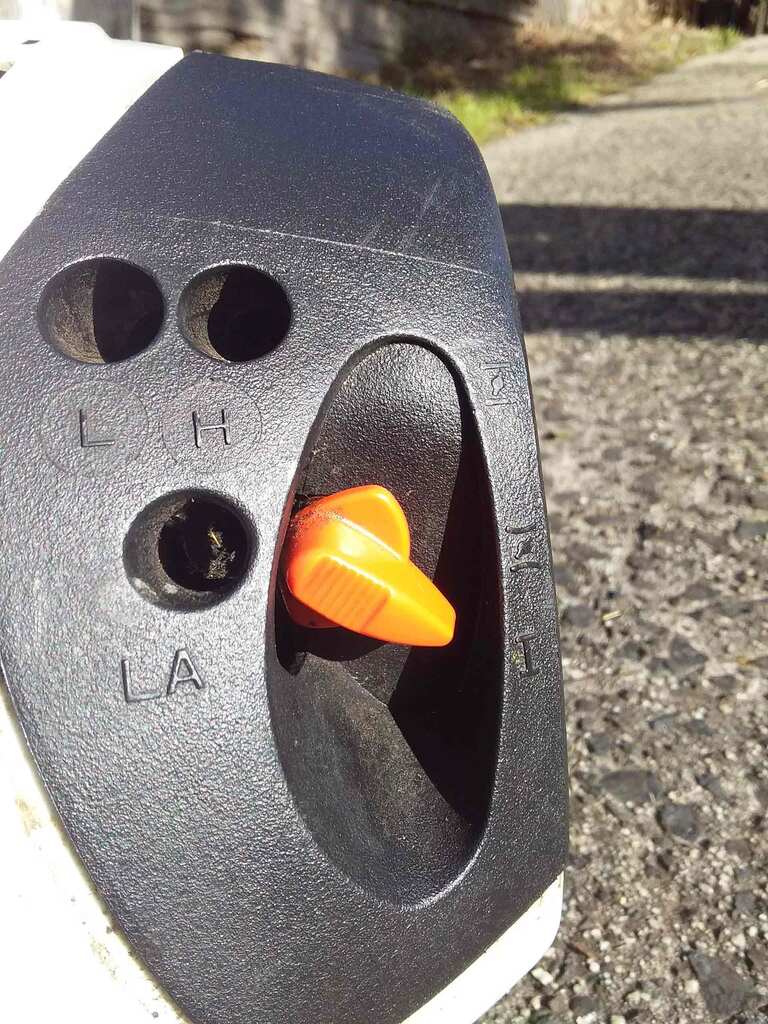
The choke switch on a Stihl combination engine. Image via Plants Grow Here.
Some machines need a bit of choke to get started and others don’t.
There’s no real problem if you forget to turn the choke off and you end up running your machine all day with choke on as long as it doesn’t affect the way you work. It’s not going to damage the engine, it’s just going to run richer and burn through more fuel.
There are different types of choke switches: some automatically turn off when you press the throttle and others need to be manually turned off. Sometimes there is a half-choke position, and sometimes there’s just choke on and choke off.
The half-choke position is good if you don’t need the full choke and want to allow a bit of airflow.
Starting Machines
Every machine is different. You need to learn your machine’s preferences by following the manual for new machines, and getting to know old machines over time.
Generally, the way to start a machine is to make sure it’s turned on, choke is on if appropriate, give it a few pumps if needed, and pull the cord with enough force to start the engine.
Don’t let the cord snap back into the machine; instead, guide it back with your hand to save wear on the machine. You might need to try a few times until you hear the engine kick over.
At this point, the engine may stop again or continue. Either way, turn the choke off and try again with the trigger on or off. If the engine’s whirring, you might need to let it warm up for a little bit or you might be able to now start working.
Don’t keep your finger on the trigger when you turn a machine off, as this can cause the engine to flood which will make it harder to start next time.
Drop Starting vs. Ground Starting
Starting the machine on the ground is safer for your body and for any objects you might smash around you as you flail about.
However, most pros will drop start the machine by standing and forcing the engine down as the pull the cord up. If a gardener is competent enough to do this safely I personally think this is fine, even though it’s usually not advised in the manuals that come with the machinery.
Cool Starting, Warm Starting & Hot Starting
Cold mornings may mean some of your machines need a bit of warm-up time and may take a bit of loving to get started. Meaning you just need to keep trying.
After the first time you start it and get it warm, the subsequent starts should be easier.
On very hot days machines may struggle too. I’m not sure I should recommend this, but I do run a whip under the tap lightly to cool the engine off from time to time just so I can get it going. I keep the engine normal side up and try not to get water down the exhaust or the air filter.
Health & Safety
This is dangerous work, so safety should always be in the back of your mind.
Stihl recommend a distance of 15 metres away from any other people when using a brushcutter, and this is a pretty good rule for any of the tools discussed in this article.
If a pedestrian is walking past, don’t just keep on working like an idiot. Stop what you’re doing and wait for them to pass. Hell, throw them a smile and a wave.
You can’t trust the public to be in charge of their own safety, that’s just asking for trouble. It’s up to you to keep them safe, and that is infinitely so for children. Read all safety labels and manuals that come with your equipment, and ensure all staff know to do the same. Seriously.
Wear your PPE, for starters that is sun protection, safety glasses, hearing protection and safety boots. Try not to walk backwards, however if this is the only ergonomic way to whip try walking backwards on an angle so you can see tripping hazards.
Do your SWMS (Safe Work Method Statements), your JSEAs (Job Safety Environmental Analysis), and your chemical sheets (recording herbicide & pesticide usage). Have your staff trained in how to safely perform all tasks and operate all equipment before their first day on the job.
Think: if there is an accident and Work Safe come to visit me, am I going to look like an idiot when they start asking questions, or can I demonstrate that I have taken safety seriously at every level? You need to do your research if you are a business owner because Work Safe are very intimidating; there are serious fines and even jail time for negligence.
A fellow team member on a different crew once tried to lift the mower deck by grabbing inside the bowl. While the mower blades were spinning.
After the Work Safe officer saw that this staff member had signed a SWMS sheet specifically agreeing that he would turn the mower off before raising the deck and would never put his hands near the spinning blades, the company was not deemed to be responsible but did have to pay a couple of weeks’ pay while the staff member recovered for a couple of weeks, after which time he was able to return for light duties. Which ironically ended up being push mowing.
But don’t worry because he never did try to reach into the bowl while the blades were turning again; later he told me that he’ll never forget the sound of chunks of his finger rolling around in the bowl.
Conclusion
So now you have the theory of how to approach mowing a lawn safely and efficiently.
It may take some time to get the hang of the machines, especially the whip and blower but with some practice, your muscles and mechanical brain will remember the processes so that you don’t have to try so hard any more.